Showing posts with label Pre-washing. Show all posts

Tuesday, 16 September 2025

Pullover Dress with Pockets: Butterick 6784

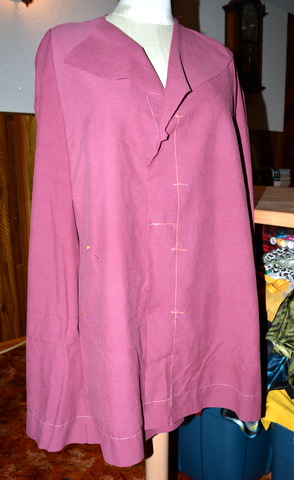
There are a couple of versions of Butterick 6784 cut and ready to sew.  This is my most recent version.  


Why so many?  Butterick 6784, designed by kAtheRine Tilton, is one comfortable dress and it has generously sized pockets.  That's it, right now in my life, dressing is all about comfort and pockets. I'm working on versions that will keep me comfortable in the autumn and winter months.  

The fabric is a medium weight cotton sateen with stretch that I found in the discounted section of the fabric store last year.  Why this beautiful fabric with this vibrant colour made it to the discounted section is beyond me.  I'm just thrilled it was there when I spotted this fabric.  It was pre-treated with a tumble in the washing machine and dryer before hitting the ironing board for a steam press prior to cutting.    

This is a well-drafted and fun project to sew.  It's a size medium and the only changes to the pattern was to shorten it two inches and to sew a 1 1/2" hem.  


Sewing IS Political

This is another Canadian 🍁 made and tariff free project.  The fabric was found at Fabricland, a Canadian fabric outlet and was discovered before the convicted felon was voted back into the white house and started his global tariff war.  The "made in U.S.A." pattern, circa 2020, was in the stash before the convicted felon won a second term and did not contribute to his tariff economy.  The cotton thread used to sew the dress and the polyester threads used in the serger are Gütermann threads and were purchased from Fabricland, a Canadian fabric outlet.  The scissors used to cut this project are from Merchant and Mills, an United Kingdom company and were picked up at The Workroom, a Canadian fabric outlet.  The label is from KATM, an Australian company purchased directed from the company.  


Project Details

Seams:  2.8 straight stitch

Seam finish:  Serged

Fabric:  2.5 metres

Knit 'N Stable tape:  0.2 metres


Pattern
Butterick 6784, circa 2020

Label:  1--"Me Made" KATM label

Additional Tools & Supplies:  Cutting tables, measuring tape, measuring gauge, pins, pin box, fabric scissors, thread clippers, Janome 4190 QDC sewing machine, threads, Janome AirThread 2000D serger, iron, ironing board and many breaks.

Stand strong, elbows up and keep sewing.  

Wednesday, 5 April 2023

Stash busting: Pull-on pants / OOP Butterick 6717

Out-of-print (OOP) Butterick 6717 (available in digital format here) is a pattern that I have been meaning to revisit since making the last pair.  I finally got around to working on another pair after I came across this cotton stretch fabric last week.  


The fabric is a cotton stretch that has been in the deep stash for years, many, many years.  It was previously pretreated and ready to cut.  

This pattern has become a go-to pants pattern because they are comfortable to wear.  I really like the comfort of the elasticized back and the clean look of the dartless front.  The pattern design has side pockets but I decided to leave them off.  

Techniques and Tips

For the last pair and these as well, I did a narrow line of topstitching at the back top edge of the elastic casing.  I used the blind hem foot and set the needle to the left side for sewing.  I switched the one inch suggested elastic width to one and one-quarter inch width.  I found these changes eliminate elastic rolling while wearing the pants.  

The side and crotch seams are serged together to reduce thread costs and time working at the machines.  I didn't match my thread colour with the fabric, just went with what was a closest match and found in the stash.  No one will notice that the serger thread colour is beige where the fabric colour is green.

Project details

Seams:  2.6 - 2.8 straight stitch

Seam finish:  Serged

Fabric:  2 metres

Elastic:  1 metre (1 1/4" wide)


Pattern
:  OOP Butterick 6717

Additional Tools & Supplies:  Cutting table, pins, scissors, ironing board, iron, Janome sewing machine, walking foot, blind hem foot, Janome serger, thread clippers, screwdriver, safety pins, and a lot of breaks.  

Happy Sewing!

Saturday, 14 January 2023

Stash / Scrap busting: Long-sleeve Pull-over Knit Top / OOP Simplicity 2372

About two months ago, a short sleeved version of out-of-print (OOP) Simplicity 2372 in this exact same fabric was created and gifted.  So why am I sewing another?   

It's all about the sleeves.  The request came across my work table for another one but this time with long sleeves.  The problem to overcome is that there was only 1.12 metres + a bit of this fabric left over from the first version.  Hmmm, perhaps this is a scrap busting project instead of a stash busting one?  But I digress.  This fabric was actually picked out for a wrap dress, only to discover that it was short on yardage.  So it became a t-shirt and there was enough left over for another, hopefully with longer sleeves.  


Thankfully, it worked out.  The fabric was previously pre-washed with a tumble in the washing machine and dryer so it was ready for a revisit to the cutting table.  

Sewing Techniques, Tips and Tricks

First thing I should address is how did I manage to cut a long sleeve version out of 1.12 metres of fabric when the pattern calls for one metre for the short sleeve version?  Check out the pattern piece layout printed on the pattern instruction sheets.  OOP Simplicity 2372 has all the pattern pieces laid out in one direction, the bottom of the sleeve in the same directional lay out as the bottom hem of the the top pieces.  Instead, just look at the pattern pieces as a puzzle piece that you need to fit in the yardage at hand.  In this case, the main pattern pieces were placed like so.  


This rough drawing, of course, is not to scale and the pattern pieces for the front (F) and back (B) were almost touching at the bottom hem sides.  You get the gist, right?  And I did have to forgo a center back that was placed on the fold.  Like I said, this version was all about the sleeves.  Of course, this only worked because the fabric did not have a one-way design or nap.  

There were enough bits and pieces large enough to cut the neck facings.  But if there wasn't I would pull out some other knit to finish the neckline.  Who would know that it wasn't matching and besides, who cares?  Just call it a creative decision!  


This might look like an easy-peasy t-shirt project but did you know there are twelve tucks and two darts?  To save time with the marking of the darts and tucks here is a trick once shared by Tilly over at Tilly and the Buttons.  Clip the edge of your fabric to mark the beginning of the dart.  And then with tailor's chalk mark the end.  Connect the markings with the tailor's chalk and you're ready to sew.  

The final tip to share is all about the hem finish.  When working with knits there are two things that I use to finish a hem: a walking foot and Knit 'N Stable tape.  Give it a try.  

Project Details

Seams:  Machine knit stitch (also known as the lightening bolt stitch)

Seam finish:  Serged

Fabric:  1.12 metres

Interfacing:  0.40 metres

Knit 'N Stable tape:  1.2 metres


Pattern
:  OOP Simplicity 2372

Additional Tools & Supplies:  Cutting table, pins, pin cushions, various heavy objects used as pattern weights, scissors, measuring tape, measuring gauge, iron, ironing board, Janome sewing machine, walking foot, a full bobbin, Janome serger, screwdriver, tweezers, threads, thread clipper and oh-so-sweet free time to spend at the sewing machine.  

Happy Sewing!

Monday, 20 December 2021

Butterick 6495: Is it a Jacket or a Cardigan?

It's nippy out there and who wouldn't want a comfy cardigan made with a warm cotton sweatshirt fabric?  This is my hope, that this cardigan will be well received.  Butterick patterns refers to this piece as a jacket but I think of a jacket as having some sort of front closing, a cardigan does not, so I'm naming this garment a cardigan.  

I would highly recommend Butterick 6495 as a quick make for someone on your Christmas list.  Or for yourself if you've been extra good this year.  It's actually the third time I've sewn up this project and I would even recommend this for a beginner.  This cardigan has only four pattern pieces (front, back, sleeve and band) and comes together without any issues.  This is one well-drafted pattern.  I was even able to flat fit the sleeves on this one.  Easy peasy!  


This fabric is a Katia print that I picked up at Northwest / Marshall Fabrics.  The cotton sweatshirt fabric is be toasty warm and the woodsy print is too cute, don't you think?  The fabric was pre-treated in the wash cycle followed by a tumble in the dryer, before it hit the cutting table.  I was thrilled that the only pressing that was required was after sewing seams and pressing the hemlines.  It handled the cotton setting on the iron very well.  


Project Details

Seams:  Lightning bolt / knit stitch

Seam finish:  Serged

Fabric:  2.4 metres

PatternButterick 6495

Additional Tools & Supplies:  Cutting table, measuring tape, measuring gauge, cord, marker, tailor's chalk, scissors, pins, pin cushions, thread clippers, Jean-a-ma-Jig®, iron, ironing board, sewing machine, regular presser foot, serger, threads (5 spools for the equipment), and sweet, precious time.  

Stay Safe and Keep Sewing!

Sunday, 14 November 2021

Wool Knit Turtleneck Dress: OOP Vogue 8939

Is there anything better than a wool knit turtleneck dress as part of one's winter wardrobe?  I'm going to have to argue no.  

This dress is created with tried and trusted, out-of-print (OOP) Vogue 8939.  I kept the same changes I made to the last version, shortened the sleeve length, lengthened the hemline, and graded out to a larger size in the hip area.  

The fabric just makes me happy.  First, I really like the colour.  Yes, I've changed.  Second, it's a wool knit.  Toasty!  And third I picked it up as dead stock many moons ago for next to a song.  It is an absolute pleasure to sew.  I did learn a lesson from the first item I made with this fabric.  It's wool so it did shrink.  I pre-washed the fabric, this time before it hit the cutting table.  Most of the shrinkage was in the width so I had to be careful with the pattern piece placement.  The back was cut with a centre back seam as the pattern intended but unlike the other versions I've made where the front and back were cut on the fold.  

I don't know what else to say about my new dress other than I'm tickled pink with it.  


Project Details

Seams:  Lightning bolt (knit stitch)

Seam Finish:  Serged

Fabric:  3 metres

Knit 'N Stable tape:  2 metres

Sewing Machine Needle:  Ball point

Pattern:  OOP Vogue 8939

Additional Tools & Supplies:  Cutting table, scissors, pins, tailor's chalk, measuring tape, measuring gauge, seam ripper, sewing machine, walking foot, iron, ironing board, screw driver, serger, threads, thread clippers and tea.  

Stay Safe and Keep Sewing!

Sunday, 7 June 2020

Linen Pants: Vogue 1642


There's a need for a new pair of pants to accommodate the pandemic pounds that have been creeping on these past few months. But I digress...

Vogue 1642 is the perfect option for a comfortable pull-on pants. These are the forth pair of pants I have made with this pattern. I really like the flat darted front with the back elasticized waist. Favourite part of these pants are the wide legs and side in-seam pockets. Oh and the fact that they sit at the waist are what make them so comfy. 

There were some small changes / alterations made to the pattern. Of course, I had to shorten hem. I shortened the hem by four inches, shortened the left pant leg another 5/8" before sewing a one inch hem. The pants were cut half way between a large and X-large from the side seam. The front darts were sewn at the large dart markings.  


The fabric is a 100% linen that has been in the stash for many moons. I picked this piece of fabric up when it hit the sale section of the fabric store. I'll admit that with the price of linen now-a-days there was some fear to cut into this fabric. There was a sign of relief that it turned out. The fabric was pre-treated with a tumble in the washing machine and dryer before hitting the ironing board for a steam pressing. The pants will be hand washed going forward.  


The Stats

Fabric:  2.15 metres (147 cm wide)

Elastic:  1.2 metres (1.3 cm wide)

PatternVogue 1642

Additional Tools & Supplies:  Cutting table, measuring tape, pins, pin cushion, scissors, tailor's chalk, sewing machine, serger, tweezers, threads (cotton for the sewing machine, polyester for the serger), safety pins, thread clippers, iron, ironing board, and a sleeve ham.    

Stay Safe, Be Kind and Happy Sewing!  

Tuesday, 2 June 2020

Slip: OOP Simplicity 8666

Another light-weight cotton slip ready to be gifted. 


Easy peasy project:  a simple bias cut cotton slip using out-of-print (OOP) Simplicity 8666. There were a few modifications to the pattern to achieve the fit needed. The sides were extended 1 5/8" from the top grading out and additional inch at the hemline. The front was lowered an inch and a half. The sides are finished with French seams. The neckline and armhole are finished with bias tape found in the stash. The hemline is shortened two and a half inches and finished with a narrow top-stitched hem.  

The fabric has been in the stash for a long time, actually picked up for lining fabric. Plans change. It was pre-treated in the wash, followed by a tumble in the dryer before ending up on the ironing board for a pressing.  


The Stats

Fabric:  2 metres

Bias Tape:  2 metres

Pattern:  OOP Simplicity 8666

Additional Tools & Supplies:  Cutting table, pins, tailor's chalk, measuring tape, measuring gauge, scissors, thread clippers, iron, ironing board, sewing machine, thread, new sewing machine needle, screwdriver and tweezers.  

Stay Safe, Be Kind and Happy Sewing!


Tuesday, 19 May 2020

Pullover Dress: Vogue 9237 and Vogue 9057

There were other plans for this woven stretch fabric.  


Plans were made to turn this piece of cloth into a version of Tessuti Patterns Eva dress. That plan changed after the fabric was pretreated and the discovery was made that there was quite a bit of shrinkage.  The 3.2 metres of 115 cm wide fabric became 3.0 metres of 112 cm fabric. Cutting out the Eva dress was no longer an option. 


I wanted an easy to wear dress and my alternative plan was Vogue 9237. I made this dress a few years back but it didn't last in my wardrobe rotation. I found it less than comfortable across the sleeve, bust and the neckline. It just felt too restrictive when I tried to use or stretch my arms. So, I tried to rectify that problem with merging these two patterns, Vogue 9237 for the bottom half and Vogue 9057 for the top half of the dress.  


This worked out well and it feels way more comfortable than the first version.  I lined up Marcy Tilton's bodice pattern pieces on top of the dress pattern pieces by matching the waistline measurement. From there I recut the neckline and shoulder seams on the dress pattern and I used the sleeve pattern from Vogue 9057. The hemline was left as is, it sits just below the knee on me. And I raised the pockets an inch. The neckline and hem were finished with bias tape. No zipper or loop and button closure needed, so I eliminated the center back seam on the upper back portion.  


Can you notice the lower back ruffle piece?  It's hard to see in this print. It's one of my favourite design features of this dress. That and the fact that this dress has pockets!  


The Stats

Fabric:  3.0 metres

Interfacing:  0.40 Knit 'n Stable tape

Seam binding:  3.65 metres

PatternsVogue 9237 and Vogue 9057

Additional Supplies & Tools:  Cutting table, pins, measuring tape, scissors, thread clippers, tailor's chalk, threads, sewing machine, serger, iron and ironing board.  

Stay Safe & Happy Sewing!

Monday, 5 August 2019

Cozy Cardigan: Butterick 6495


Butterick 6495 contains a lovely cardigan pattern that I'm revisiting for this gift project.  I don't know what to say about this pattern other than it's well drafted.  This Lifestyle Wardrobe pattern also comes with other pieces for a top, dress, jumpsuit and pants. It's well worth the investment.  

The fabric is a cotton sweatshirt fleece that I pretreated according to the colour. I pre-soaked the fabric with this method and washed it with vinegar in the washing machine followed by a tumble in the dryer. This is with hopes that there will be no bleeding of the colour in the future.  

It was sewn throughout with the knit (lightning bolt) stitch on the sewing machine and the hems edges were interfaced with Knit-N-Stable tape. Not alterations to the pattern were made.  

The Stats

Fabric:  2 metres

PatternButterick 6495

Additional Tools & Supplies:  Scissors, pins, pin cushions, tailor's chalk, iron, ironing board, sewing machine, serger, walking foot, threads, and a few breaks.  

Happy Sewing!


Saturday, 22 June 2019

The Pre-treatment: Seeing the Right Amount of Red

Do you pretreat your fabrics before you embark on a new sewing project?  

Generally, I do pre-treat my fabric with the method that I plan to launder a project once it is complete. Sometimes, I don't for one reason or another.  


My Euro Cup final dress was a last minute project when Portugal made it to the final game match. There wasn't any time to waste so I skipped the pre-treatment process and this became a one-wear wonder. The red dye bled all over the neighbouring colours. It broke my creative heart because of the memories tied to it and it was comfortable too. Lesson learnt.  

Fast forward, with a stop down memory lane. A couple of years ago I spotted this project, a festive Canada Day worthy shirt. I always admired this project, and how fun would it be to have your own unique Canada Day shirt that is not a t-shirt? Quite fun, I thought when I spotted this cotton print.  


Yes, just like the Portuguese flag, Canada's flag colours also have red. This is going to call for some careful pretreatment in case this fabric is a bleeder.  And I wasn't willing to risk it so I did some research.  


It came out just lovely wrinkled but the print is the same and the colours are in their original state. kAtheRine Tilton's Butterick 6325 is the pattern I'm thinking about using moving forward. I wonder if I can get this done in time? Next up a good pressing before this moves to the cutting table.  
  
Happy Sewing!

Friday, 18 January 2019

To Pre-shrink or Not

Some think that it's unnecessary to pre-treat fabric. 

{Source}
Yet anyone who has purchased ready-to-wear (RTW) and has lost a garment in just one wash due to shrinkage knows that manufacturers often cut out this step in order to get garments to the market quickly. Maybe that is why the RTW landscape is over run with oversized basic baggy styles? As sewists, we're in control of the quality of the items we sew. So, the question today is do you preshrink your fabric before cutting out a project?   

Cotton stretch shirting fabric.
Pressing out the length of cotton shirting fabric that I plan to use for the next project, I noticed a that my fabric shrunk both in the lengthwise and crosswise grain by a noticeable amount. Luckily, there was enough fabric to cut out all of the pattern pieces. I always pre-treat my fabrics before I cut them out but to be completely honest, my motivation is more about having a cleaned product on my cutting table. The length of fabric came from a shop that had a cat.  I'm terribly allergic to cats. But I digress...

Back to the question of pre-shrinking your fabric. Vogue Sewing, my go-to sewing reference book instructs us to shrink fabric if it hasn't been pre-shrunk by the manufacturer or if it will shrink more than 1% according to the label.  

The advice written in this edition of Vogue Sewing was written in the mid-nineteen-seventies.  I don't know about your local fabric labels but this is unheard of in this part of the world. As a matter of fact, I've never seen a fabric label that contains this information. It's more common to find "unknown fibres" stamped across fabric labels found at the local Fabricland and even more rare to find a label at Northwest Fabrics.   

Vogue Sewing doesn't go into how to test if a fabric is prone to more than 1%, for this information, I was able to discover the method in Sew A Fine Seam, circa 1955. 
If possible, procure a generous sample--at least 1 x 2 inches in size, with a selvedge--so you can easily determine the lengthwise and crosswise grain of the fabric.  Trim the raw edges of sample so the edges are "clean cut."  Cut a piece of paper the exact size of the sample.  Wet sample thoroughly and lay flat to dry.  Do not press dry.  When sample is completely dry, compare with paper.  The slightest difference in size indicates shrinkage. Supposing your fabric was cotton, 36 inches wide and the shrinkage was 1/32 of an inch in the lengthwise grain and 1/16 of an inch in the crosswise grain.  This may seem a very slight amount, but in a yard of fabric, it is enough to result in a snug garment after it has been laundered or dry cleaned (Wilson, 35-6).

This method is basically explain in here as well.

I didn't do the sample test on the piece of fabric I was pressing when I noticed that the crosswise grain was smaller than prior to the tumble in the washing machine followed by the dryer cycle. Instead, I measured my the lengthwise grain before and after and discovered that I lost 0.3 metres in the process.  I'm quite relieved that it shrunk before instead of after I sewed my project. 

Allowance for Shrinkage

What do you do if you're trying to decide on how much fabric is needed for a project when you're not in the position to do the shrinkage test?  Pattern companies don't incorporate a shrinkage allowance when listing the yardage requirements.  It would be a tough thing to suggest considering that different fabrics behave differently when washed or dry-cleaned.  

Sew A Fine Seam provides a quick general guideline:  
  • Allow 1/8 yard or 0.11 metres for a blouse, skirt, or jacket.  
  • Allow 1/4 yard or 0.23 metres for a dress, suit, pajamas, or coat
  • Allow 1/3 to 1/2 yard or 0.30 to 0.46 metres for a floor length garment if the width of your fabric is 36" or 54" respectively.  
If I went with this I would have underestimated how much shrinkage would have occurred with the cotton stretch fabric on my cutting table. These recommendations are from last century when body shapes, clothing styles and fabrics were different than they are today so I would only take them as a interesting footnote rather than a steadfast rule.

I do like the sample test for shrinkage as a reference but to be honest, I don't really put that much research into how much a fabric may or may not shrink.  How about you?  Or do you just cut and hope for the best?

Happy Sewing!


Monday, 7 August 2017

For Some Reason...

I feel like eating a piece of Lemon Meringue pie. It might be because I skipped dinner last night to work on this dress. Plus throw in my sweet tooth into the mix. Or perhaps it's the colours of this silk fabric?    


This is the latest version of the Eva dress by Tessuti patterns. Oh. My. Goodness. This might be my favourite version so far and not because it's invoking thoughts of pie.  


I made all the changes to this dress as I did the last version and I'm just thrilled with the final fit. I changed the shape of the neckline by raising it all around by 1" providing more coverage and still allowing the design to remain a pullover style. The short sleeves were lengthened another inch and a half. The seam allowances were sewn with 5/8" instead of 1/2" allowances. The pockets were raised an inch and the hem was shortened by two inches.  

Inside look.  

Even though there was enough fabric to make my own seam binding, I used up some left over seam bindings that I found in my stash. I used some regular old white double seam binding for the neckline and sleeves. I didn't have enough for the hem but I did have just enough satin binding left over from this project. It felt good to use up supplies from the stash.    

Once again, I didn't follow the instructions, changing the order of construction. The only reason is that I felt comfortable doing it my way. Why set-in fitted sleeves when you can flat pin them? This is a perfectly drafted pattern making it easy to do.  
  1. Sew the shoulder seams.  As mentioned previously I made this dress with 5/8" seam allowances. Press open.  
  2. Reinforce the neckline seam with Knit-N-Stable fusible tape. Insert seam binding.
  3. Flat pin the sleeve cap to the armhole seam.  
  4. Sew the centre front and back seam of the upper skirt.  
  5. Attach the upper skirt to the bodice pieces.
  6. Sew the centre front and back seam of the lower skirt.
  7. Attach the lower skirt to the upper skirt matching centre seams.   
  8. Serge curve edges of the pocket pieces.  
  9. Attach the pockets to the upper skirt section with 3/8" seam.  
  10. Serge the raw edges of the pockets and press open.  
  11. Pin the sides, pockets and sleeves and stitch.  
  12. Finish the sleeve hem with seam binding.  
  13. Finish the lower skirt hem with seam binding.    

The fabric is a silk fabric that I found in the home decor department.  


If it looks familiar, you might have seen it in another colour when I made this top. It is a medium-weight silk that I found at my local Fabricland store. I often find treasured pieces of fabric in the home decor department and these were some of my favourite finds. And there is still some left on the bolt. It was pre-treated with a tumble through the washing machine and dryer and a pressing on the silk setting. It handled the pre-treatment process very well. I will say that I had to work quickly and carefully with this fabric. The threads on the cross-grain certainly frayed as I work and if I wasn't careful the wrist pin cushion I was using would catch on some of those fraying threads. The seams down the sides didn't fray as much as the hems.  

Well, the latest version of the Eva dress will be the last one for awhile. There are other projects that I need to get to and Mama R has been patiently waiting for another dress or two. I should get to work on those.    


The Stats:  

Fabric:  2.7 metres 100% silk

Seam binding:  2.8 metres 

Fusible Tape:  1 metre Knit-N-Stable™ tape

Pattern:  The Eva Dress by Tessuti patterns

Additional Tools and Supplies:  Cutting table, silk pins, scissors, thread clippers, iron, ironing board, sewing machine, walking foot, serger, threads for the sewing machine and serger, measuring tape, tailor's chalk, tailor's ham, sleeve ham, good tunes and coffee.  

Happy Sewing!  


Tuesday, 12 January 2016

Vintage Cape: Fabric & Supplies

I found my fabrics for the vintage cape at Mitchell Fabrics. I was quite thrilled when I stumbled across this red wool that reminds me of the Kate Spade cape I so admire. It almost made me forget about the beautifully soft black cashmere that I walked by moments before and which was so out of my price range. I happened to pick up the last of the red melton wool on the bolt and luckily it was the exact yardage that I required.  

  
This melton cloth (shown on the left) is a 70% wool and 30% rayon blend. The lining (shown on the right) is a 48% cotton and 32% acrylic kasha satin. I did spend some time looking through their vintage collection of coat buttons but didn't find anything to go with the fabric. It didn't have to be red buttons, I was looking more for interesting and unique. These understated buttons I found at Fabricland and just happened to be a perfect match with my fabric.  


I cut and sewed the front, sides and back of the cape pattern to test out the fit and figure out where I would like to place the pockets. All that is left to do is trace out my pattern pieces, pre-shrink my fabric and cut it out.  


Unlike some vintage patterns from the 1970s, this one does not come with separate pattern pieces for the lining. This means that I'm going to take some time this week and copy my pattern lining pattern pieces before cutting.  


In the meantime, I'm getting my fabric ready. The lining fabric has already been pre-treated with a run through the washing machine and two dryer cycles on delicate. It is currently hanging on the drying rack waiting for a light pressing. The wool I'm torn on how to pretreat it. Any suggestions?  

There is the London shrink method and there is this dryer method. Of course, I could take it to a dry cleaner. If only there was a dry cleaner I would trust with my fabric. I am leaning towards the dryer method. It might be tricky while dealing with an injured wrist and wearing another brace. We'll see... What is your preferred method of pre-treating wool?  

Happy Sewing!  


Monday, 5 October 2015

Pressing and Ironing

One of my least favourite chores has to be ironing. It has been a life-long dislike that jeopardized my Home Economics mark back-in-the-day. You see back then I didn't realize the difference between ironing and pressing--other than it uses the same tools which I just thought it couldn't be good thing.

{Source}
  
I still don't like ironing yet that is how I spent my free time this evening, ironing trying to iron twelve metres of pre-washed fabric for the angel costumes. I couldn't do it. 


I'm done for the evening, maybe tomorrow I'll try to do the rest. I might have to pick up wine to finish the job (just kidding). Ironing this much at once amplifies the tediousness of the task that just just seems never-ending. Yet I don't mind pressing as much as I do ironing.  

Pressing while I sew, I don't find tedious. It is actually a welcome break to get up, stretch, and walk over to the ironing board. Pressing, unlike ironing, I find to be part of the creative process. I wonder why I see ironing in the same light.  

Yet there are those who enjoy ironing. Maybe I need to take up mindful meditation during my marathon ironing sessions? Find the beauty in the hissing sound of the iron, the smoothness of the iron as it glides back and forth over the nubbly twill surface of the cotton fabric.  

Or I could just pick up some wine. We'll just have to wait and see what tomorrow will bring.  

Happy Sewing!  


Saturday, 8 November 2014

In Sewing News Today...

Laundry day does not typically hold a great deal of excitement but today it did. Do you remember the dress pj's that I made earlier this week? Well, I wore it a couple of evenings this week and slept comfortably in it and then it ended up in the wash. And HALLELUJAH!, it shrunk. I don't believe I have ever been this excited about something shrinking.

It now fits comfortably as a dress! I think Athena, Greek goddess of Arts and Crafts, was smiling laughing and took pity at all the sewing bloopers I've made this year. Yup, Athena's sense of humour was a play here.

I don't have to touch it at all. It shrank perfectly. The pockets are now sitting at the perfect height. The hemline is shortened but still at a midi length. It is crazy, in a good way, how it turned out. And I could have sworn that I pre-shrunk this fabric. I guess not?

So be fore-warned, McCall's 6600 is a very loose style. Perfect for pjs or a dress. The plan is to wear it as a dress now and embrace the prairie gal look now that the temperatures and hovering below the zero mark.  


This week I found a void in my wardrobe. I need sweaters, turtle neck sweaters. Now if it weren't for this RTW fast, I would have run out to the store and picked up a sweater by now. But instead I shopped for patterns and I have two that I would like to try. First is this, Burda 6990, pattern (shown above) and there is also Vogue 8939 that might also work. 

I'm going to test out the Burda pattern tomorrow on some orange knit fabric before I cut into fabric pictured above.  I just want to make certain what pattern will work best. Right now, I'm preshrinking the heck out of the orange and taupe patterned fabric since it is a rayon and spandex blend. I typically run the other way when I see rayon listed on the label but I fell for the print. When I decide on which pattern to cut this fabric and make the top it will go well under this dress/jumper.     


And I finally got my hands on Marcy Tilton's latest skirt pattern that I would like to make with this jacquard knit fabric. One more sewing day tomorrow and I'll have a day off from work on Tuesday so hopefully, I'll be able to fit these projects in this week.  

Well, that's all in sewing news today... 

Happy Sewing!    


Sunday, 8 June 2014

In Sewing News Today...

I signed up for The Pants Contest over at Pattern Review. The plan has been to make a pair of pants using Vogue 8887. I chose this pattern for the challenge. You see, they're underlined and it has a gross grain ribbon waist treatment.  


I've never sewn an underlined pair of pants. Plus they have pockets and cuffs. Sew far, the challenge has been pretreating my fabric. Yup, I haven't even cut them out yet. I picked out an olive green linen and lining. I serged the edges and threw them into the washing machine on the delicate cycle.  

Everything appeared to come out fine until I was pressing the last bit of my linen and noticed spots. These spots were not there before I pretreated my fabric. I suspect they are fabric softener stains. And they are stubborn.  

My linen fabric went in the wash for another tumble minus the fabric softener this time. It came out a wee bit better but there are still remains visible stains. Right now it is soaking and waiting for another tumble in the washing machine. Fingers are crossed that the stains come off this time. I doubt that I will have enough time to finish them for the contest. None-the-less I hope the fabric can be saved and I'll be able to make these pants for the summer. 

While I spent my day trying to pre-treat a piece of fabric, I did manage to do some sewing. It falls under  the ugliest thing I ever sewed. And it is for Mama R. Some days are just not meant to be spent sewing. I could try to blame it on the sinus infection and cough but I shouldn't. I should have trusted my instincts.  But I didn't.   

Hopefully, Sunday will be a better sewing day. I picked up McCall's 6654 and plan to make another maxi skirt to replace the one that was destroyed by weeds last summer. 

Well, that's all in sewing news today.  

Happy Sewing!  


Sunday, 1 September 2013

The Tim Gunn Project

Next up:  The Classic White Shirt.

I pinked the edges of my white fabric and threw it in the wash for a pre-shrink. Well you wouldn't believe how much it frayed!

I don't believe that there is 50% cotton in this fabric by the amount of fraying, the other 50% is suppose to be polyester. I'm going to take care with pressing this fabric.

Moving along, I changed my mind on the pattern when I stumbled across Burda 7136. I've read some great reviews and I'm going to give this pattern a whirl.

It has sleeve plackets and even french cuffs! For this white shirt I'm going to make style A. Burda lists this pattern on it's website as a vintage design. Whatever they want to call it, I think this pattern will work as a classic white shirt.

Happy Sewing!  

Friday, 19 July 2013

The Quest for a Great Fitting Pair of Pants: Chapter 6

Have you seen the latest issue of Vogue Patterns (The Ultimate Sewing Magazine)? The August / September 2013 issue is my favourite issue EVER. It is full of upcycling ideas and sustainable designs. I'm lovin' it!

Even the pants pattern, Vogue 1325, that I am currently working on is featured in "Making Do:  Transforming Midcentury Thrift into Modern Style" (70). They utilized the pants pattern to make the most adorable shorts from a recycled mens' tailored jacket. Très chic!

Talking about Vogue 1325. Oh my goodness! I love this pattern. It is coming together beautifully.

I just have to stop munching on the bag of Brookside Dark Chocolate Acai Blueberries that are sitting too close to the sewing machine because these pants seem to fit!

I've mentioned that I'm sewing these with my fingers crossed instead of sewing up a muslin first. Yes, I'm full of bad habits besides munching on chocolate while I sew.

The pants are being sewn up in a pre-treated navy 100% British wool fabric. I used the damp towel in the dryer method. I've had good results with this in the past. I shortened the length of the pants by 4" because lets face it, I'm no Vogue model. After making the New Marlene Dietrich-style pants, Burda 7122, I realized that I'm different sizes at different parts of the pants. I returned to the size 14 crotch length. The inner leg I went up a few sizes where the outer leg seam I stayed at a size 14. It seems to have worked.


This morning I was working on the front fly. The instructions are different than others that I have done in the past. There are no complaints, everything is working out fine.

I'm just taking a wee break from sewing and trying to find a good hiding place for these chocolates sew that I can make sure I fit into them finish these pants

Happy sewing!


Monday, 17 June 2013

In Sewing News Today...

Some days I just shouldn't read sewing blogs and click on links to beautifully funky shoes. Oh my goodness, have you seen these?


Thankfully, they are not in my size. Otherwise, I might be tempted to pick up these three and three-quarter high-heeled beauties that would not be the best thing for my knees. Aren't they pretty though? 

Over at Gertie's Blog for Better Sewing, Gertie is also tempting sewing peeps with more gorgeous floral fabrics. I'm going to have to muster all the will-power that I can and remind myself that there is a seasonal lay-off around the corner.  

In other sewing news, I've been busy cleaning and de-cluttering this past week. I'm so ready to spend some quality time with my sewing machines. I have yet to participate in the fabric stash busting contest over at Pattern Review. 

Right now, there is some cut yardage in the laundry room waiting to be pre-washed for a pair of pants. But first, I'm going to have to clear off some mending projects that have been hanging around for far too long. Not my favourite type of sewing--it's a dirty job but someone has to do it. Sadly, that's me. Missing the fun sewing that is hopefully around the corner.  

Happy Sewing!  


Tuesday, 19 February 2013

Holy Moly!

I'm sewing altar linens, I thought the title works. I've been busy cutting, pressing and sewing 100% linen this weekend.

I have to tell you that I did expect the linen to shrink after I washed it in the washing machine and threw it in the dryer for a tumble. But Holy Moly, I didn't expect it to shrink as much as it did!

In my naivety, I thought the shrinkage would occur in the length of the cloth, but it happened to the width as well. I know, what was I thinking. At the fabric store I estimated that I could cut four purificators out using the layout of the short edge of the purificator along the selvage of the fabric. That was my estimate in the store. I was thinking that I would be able to fit more throughout the length of the cloth. But it is not working out that way, sigh. Instead, laying out my sample piece the other way and I manage to cut six from one width. I'm still getting a good yield from the cloth. I'm just surprised with how much the fabric shrunk.

Sew far, they are coming along nicely. They are not all perfect, just like the sewist. I can say that I'm trying my best. Twelve were completely finished this weekend. And I did manage to cut a whole stack ready to press. Ah pressing, you are my lenten penance this year. A necessary step none-the-less. There are some interesting tips for pressing linen. Have you ever heard of putting your fabric in the freezer before pressing? I wonder what might happen if you forgot about it, freezer burn? But I digress... I found some great tips for pressing linen.

The sewing part I love. Nice small seams that allow me to get up and stretch every now and then. I figure if I shoot for three a day, I can have these finished by Easter.

Happy Sewing!

Designer, Bob Mackie

Source :   Photo Credit: Harry Langdon/Getty Images Today is a sad day in the designing and sewing world, Robert Gordon Mackie passed away. ...