Showing posts with label Underlining. Show all posts

Monday, 22 October 2018

Sewing a Winter Coat: Tips and Tricks

The evenings are getting chilly and that's a good reminder that winter is around the corner and thoughts of sewing a winter coat come to mind.  There has been a lot of reflection on past coat projects.  Here are a few of my tips, thoughts and tricks for sewing a winter coat.  

It's an investment in both time and materials.  Take your time and enjoy the process.


  • Invest in a clapper if you're working with wool fabric or if your coat has some tailoring.  It will make a difference to the quality of your pressing.

  • A walking foot is worth every penny especially when it comes to sewing several layers together. 
  • Do some research.  Check out the latest styles at the stores and then shop at the vintages shops to compare the differences.  Some vintage coats have some smart design features that you won't find in RTW and that you might want to adapt into your new winter coat. 
  • Give special consideration to your interfacing.  Back-in-the-day, my home economic teacher taught us that your interfacing should be the same weight as your fashion fabric.  Let me just say she was right.     
  • Consider how you'll use your new winter coat, are you able to stay warm while pulling off the latest Meahen Markle inspired look?  
  • Or do you need something to fend off the below freezing temperature and mind numbing wind chills?  
  • Adding an extra layer of warmth by underlining your coat could be an option that you might want to consider.  Although, I would like to avoid man-made fibres in my clothing I will admit that adding a layer of micro-fleece as my underlining fabric proved to be a way to stay warm during those brutal windchilled days.  It proved to out-perform cotton flannel and wool suiting as underlining fabrics.  
  • Coating fabric is another consideration.  I like wool because of its anti-bacterial properties but it is also warm. Melton fabric is a traditional wool fabric know as hard wearing and both wind and weather resistant qualities.  Today, melton fabric is often found to be a blend of wool and polyester dismissing some of those traditional admirable qualities.  So read your labels.  But there are also speciality fabric that are designed to protect against the elements.  Before considering your fabric consider they lifestyle you lead.  
This will bring us to choosing your pattern.

Are you looking for a look that is comfortable and all about enjoying the great outdoor in the autumn months?  Or perhaps you live in a climate that evades the deep freeze and you can get away with this as your winter coat?  Lucky you!     

Minoru Jacket 
The Kelly Anorak Jacket

Then perhaps the Minoru Jacket by Sewaholic Patterns or The Kelly Anorak Jacket by Close Case Files might appear to your adventurous side.

Or perhaps something vintage?


There are so many options out there that can help you create a winter coat of your dreams.  I say, just go for it.  You'll be surprised just how rewarding it is to make a winter coat and it's really not that hard.  Just slow down and enjoy the process. 

Happy Sewing!


Friday, 12 January 2018

Which Winter Coat Held Up Best?

I have officially finished my winter coat this week. My latest version ended up back on the sewing table to add some interfacing to the sleeve hem. And this week, now that the temperatures took another dip into uncomfortable conditions, it is ready for it's official deep freeze test drive. Like much of North America, we here have been experiencing freakishly cold wind chills. Being a hardy Canadian who actually enjoys winter, my new winter coat and I are up for the challenge.   

Coat #3

Yes, I have already made two winter coats in the past, so you might be wondering what's the challenge in making another winter coat. Well, this winter, I'm also trying to steer away from man-made fabrics such as polyester, rayon, and mystery "unknown content fibres" so what's a gal to do when Kasha lining is out of the question. Now, don't get me wrong. I think that the Kasha lining that I used in the previous two coats has held up very well. And I would recommend using it if you're making a winter coat. I, just because of this current man-made vs. natural fibres experiment, chose not to this time.  

Let's take a look at some of the things that worked and didn't work in the last three winter coats that make it worthy to withstand a prairie winter deep freeze.  

Fashion Fabrics

I love wool. To me it has been the warmest fabric to wear. It's breathable, it has anti-bacterial properties and did I mention that it's warm?   

Coat #1 was made with a 100% wool fabric. It's a thick fabric with a large weave and when I held it up to the light, you can see light through the weave.

Coat #1

I honestly didn't think that it was going to be very warm because of the weave. But it is, and it's held up very well in that department. Where it didn't hold up as well was in the shedding department. I leave evidence everywhere that I sit while wearing this coat. A few fibres that rubbed off here and another few fibres there. It's like my calling card.


Every now and then I have to give it some tender loving attention with the sweater shaver and remove the collection of fibres that gather on the surface.  

Coat #2

Coat #2 is made with a Melton wool from Italy. But it is not a 100% wool, it is actually 70% wool and 30% polyester. You have to be careful when you picking up fabric because often how it is displayed on the table is not necessarily the full picture of the fibre content. Melton is a dense and tightly woven fabric that has been felted and brushed to produce a soft hand. This conceals the weave of the fabric. This coat is no where as warm as the first coat that I made even though both have Kasha lining and are underlined. This fabric is perfect for an autumn garment, a jacket or lined cape but it's not the one that I reach for when the temperatures really take a dive.

Coat #3 (first photo) is also made out of 100% wool with a nap and it's oh so stroke-able if I could bare exposing my hands in this deep freeze. This fabric is lighter than the other two wool fabrics and it does have more of a drape. I will admit that I wondered if it would hold up in the cold. And yes, it does.  

Underlining or is it Interlining?

Actually, there is a difference. It relates to the function of the garment. Underlining is used to enhance the fashion fabric with opacity or structurally by adding more body. Interlining is added to a garment when more warmth is required. An interlining could take the form of a heavier fabric or a lighter weight fabric. It's whatever you like. 

Coat #1 has a micro-fleece interlining. The micro-fleece fabric I chose to interline the coat surprised me with how well it blocks the cold mainly because of it's light-weight and thinness. With a thick wool fashion fabric, these two fabrics worked well together. 

Coat #2 has a dense cotton flannel interlining. It is heavier than that polyester mico-fleece used in coat #1, but no where as warm.

Coat #3 is interlined with wool suiting fabric. Yes, it does seem to be extravagant and it did hurt to put that much expense into something that will never been seen but I have to admit, it is worth every penny. Out of the three winter coats, this one is the lightest one and yet it is the warmest to wear. There is another barrier that has been added for another layer of warmth.   


A few years ago, I recycled this piece of leather from one of my ready-to-wear (RTW) winter coats. It was found hidden in between the fashion fashion fabric and lining. All the years that I was wearing the RTW coat I had no idea of its existence. This piece of leather is called Chamois leather.  Chamois is a porous leather that originally came from the chamois, a European mountain goat. Hence, it's name. Today, chamois is often made from sheepskin.  I have no idea if this piece is goat or sheep skin, all I do know is that it provides an excellent barrier from the cold. I interlined the back from my shoulder to my hip area with this piece sewn to the main piece of interlining.  

Lining Fabrics

Most people when they think about coat lining consider Kasha Satin. The original heavy Kasha satin is made up 51% acetate and 49% cotton and it's warm. It has a satin finish on the right side with a flannel back. Be careful of imitations of the original heavy Kasha satin lining though. There are lighter and polyester versions that are no where as warm as the original Kasha satin lining.  

Coat #1 has been lined with the original heavy Kasha satin lining. It is one warm coat. Coat #2 is lined with a lighter weight polyester Kasha satin lining and it hasn't measured up to Coat #1.

I took another direction with coat #3 and lined it with Dupioni silk. Dupioni silk has a plain tightly-woven weave that is similar to shantung but slightly thicker, heavier and with a high slub count. I do have some concern with how well it will hold over time and the warmth factor but I'm thrilled that my lining fabric is a natural fibre. And so far, coat #3 has kept me warm, even in a minus thirty-five degree Celsius wind chill.    


All three coats have an inner elasticized cuff. I used lining fabric for the cuffs, mimicking the design from a vintage coat I inspected and admired. It was a learning process and by the third coat I achieved the most pleasing inner cuff. There are other methods for making an inner cuffs to be found online, and I encourage you to try any one of them as this feature does keep that wind from blowing up your sleeves. Jenna Sauers wrote a wonderful article, How to Winterize A Coat detailing how she recycled socks for this feature. 

So which coat held up the best. As far as keeping me warm during this chill, coat #3 is my go-to coat.

Happy Sewing!

Monday, 5 December 2016

Winter Coat: Underlining

Progress on the coat slowed down today. I do believe that my plans to sew a winter coat in a weekend were overly ambitious. Between the stabbing pain from this sore throat when I cough and the chills to the breaks to mix some tea, honey and lemon, I'm amazed that I got anything done this afternoon. 

Mind you there was a near error so it's a good thing that things slowed down. Luckily, no seam-ripper work. I might have given up if it came to that.   

I'm currently working trying to work on the inside of the coat and this is where I've taken a detour from the pattern instructions and creating more work for myself. So far, I'm not regretting any of the extra work. The hem bands have been attached with one small change, I interfaced them with a fusible interfacing. I like that the hem has more structure than if it were left without interfacing especially with the hem darts.  

The other detour is that I chose to underline my coat. Underlining is basically another layer of fabric that has either been sewn to your fashion fabric or in this case my coat lining. There are many reasons why one might want to underline. It is a technique that is asked for in some of my vintage couturier patterns. And I underlined an eyelet fabric for modesty reasons with this vintage wrap dress. With this coat project it is all about warmth. 


Instead of underlining my fashion fabric like in the previous projects, I'm going to baste my underlining fabric to my lining fabric. You might see this as being referred to as interlining in some sewing reference books. The fabric I chose for this is a light-weight fleece. If money was no object, I would have gone with a light-weight wool. Just to make sure the wind wouldn't blow right through me.    

Most reference books suggest cutting the underlining fabric, basting to the lining (or fashion fabric) and then sewing but I decided to sew the darts individually rather than together.  


It worked and I didn't have to worry about the layers slipping as a stitched the darts. Right now the back piece is pinned and waiting to be basted. I still have to cut the underling fabric for the sleeves and front. Stitch more darts and baste. This might take awhile and feeling under the weather I'll be happy to have this project all wrapped up by Christmas. Hopefully sooner!  

Until then... happy sewing!  


Friday, 1 August 2014

Matching Jacket for Mama R

Stash busting 2014:  Navy Satin Crepe Jacket

Fabric:      1.2 metre of satin crepe
                1.2 metre of silk organza
                1 metre of lining
                0.5 metre of medium weight woven interfacing

Thread:   polished off another spool of thread.

Pattern:   Vogue 8916

To be completely honest, I was not all that thrilled about tackling this project. I didn't think that the satin crepe would work with the cardigan shaped jacket pattern. I was wrong. It all worked out beautifully.


And now Mama R has a matching jacket to go with her navy crepe dress.  

I underlined the satin crepe with silk organza. I have to say that I'm a huge fan of underlining. The difference it makes to a garment is incredible beyond words.


Yes, it is time consuming to hand baste the organza to the fashion fabric but it really is worth the work. Erica B recently posted a make that she underlined but used her sewing machine to baste the underlining in place. It worked out great--smart lady! Since the fabric that I was working with was on the slippery side I thought I would try machine basting for another time. I also basted the markings for the back shoulder dart through both layers of the organza and fashion fabric. With all the prep work done I was able to get to work.  


This jacket is a quick make after all that prep work, of course. The front piece is underlined with a stiffer non-fusible interfacing fabric. But I also underlined the front facing with organza. There was no cutting corners when sewing for Mama R. Okay, maybe I did cut corners in one part of the jacket.


The inside of the jacket is lined with a blue lining but I came across the sleeve lining in navy that I cut out for the first version of the jacket which I left off and I used that instead of cutting a new set. No one will ever see that the lining pieces don't perfectly match except Mama R, me and you. Our little secret.

The more I sew up this pattern the more I'm becoming a huge fan. And now that this is the third version that I have made it really didn't take much time at all. I have one more version in queue.

Happy sewing!


Friday, 11 July 2014

Building a Good Foundation

I'm working on Mama R's jacket, Vogue 8916. This is the second time that I am using this pattern.  

Mama R has been window shopping for a new jacket for quite some time and she has quite a few RTW jackets in her closet. The trouble is finding one that fits and looks good. This project has been long overdue! Mama R was actually the one who spotted this pattern and she has re-designed it to hit all her wants and needs.  


She asked that I lower the front neckline curve down one inch and add another inch to the length of the jacket. She also requested full length sleeves instead of three-quarter length sleeves. The biggest changes were made to the inside of the jacket.  


All of the pattern pieces (excluding the lining pieces) have been underlined with silk organza. Underlining is not called for in the pattern instructions but I recently became a fan of underlining after seeing the difference that it makes to a garment after I worked on Vogue Couturier Designer pattern from the nineteen seventies.  


The jacket front calls for fusible interfacing in the instructions but I went with a horsehair canvas instead. Horsehair canvas is used for interfacing tailored clothes so I figured it would be perfect for this project. Little details that I believe are making a good foundation and hopefully Mama R will have a jacket that she has longed for.   

Happy Sewing!  


Thursday, 15 May 2014

Underlining: The Seen Hero

I first wrote about underlining a few months ago when I was sewing the Sybil Connolly dress. I used underlining for that garment to give the fabric support and shape. The underlining was perfect for the polyester suiting fabric that had a bit too much drape.  


This is not the case with the current project that I am working on. Here, I underlined most of my pieces for modesty reasons and the fact that I don't want to wear a slip with this dress.  

Threads magazine suggests basting the underlining fabric to the fashion fabric before it is cut. I didn't do this, instead cutting out my fashion fabric and then my underlining and then basting the wrong sides together.  

This dress pattern has back darts from the shoulder and waist and I also basted the underlining and fashion fabrics outlining the dart placements. I did this so as not to encounter any puckering while sewing the darts since I'm working with a heavier cotton lace-eyelet type fabric.

The exciting part is that I started machine sewing this tonight!

I really do like sewing with vintage patterns because they always surprise me with techniques that I haven't encounter before. The bodice side is sewn to the front bodice and skirt piece which is cut as one and there is a sharp corner to contend with.


The pattern instructions ask you to reinforce the corner not with just stitching but also a "2" squares of remnants." It worked out beautifully.


The corner remnant is then trimmed and the reinforced corner is clipped. Instead of using a remnant, I used a two-inch square piece of purchased bias tape that I had sitting in my stash. Simple reinforcement technique that I think I will adapt into my other sewing projects where there are corners.


The part that I love so far about this dress is how the underlining fills out the gathers on the dress.

Well, I have an early morning and it is well past my time to shut down this sewing space.

Happy Sewing!    

Thursday, 27 February 2014

Underlining: The Unseen Hero


Today is Sew Grateful Sewing Project Day.
Showcase your latest sewing project. Whether it's a project using up that pattern that was a present from someone or that you won in a giveaway or using a tutorial someone has prepared, or even a project inspired by someone in the sewing community... the possibilities are nearly endless!
I have nothing to show and tell at this time but this is the project that I've been putting a lot of time and effort into and hopefully by the end of Sew Grateful week I will finally finish it (fingers crossed). It is an underlined dress, I thought I would blog about this process.

*****

One of my 2014 goals is to do...
Learn and incorporate more tailoring and couture techniques into my sewing (more slow sewing).
That is exactly what I've been doing "slow sewing" or more specifically, I've been underlining a dress. 

Have you ever underlined a dress before? 

You may have interlined a garment under another name. According to Kenneth D. King there is often some "confusion surrounding the terms underlining and interlining" (41). King explains that the two terms are interchangeable and refer to the same technique. Flat-lining, a less used term, also refers to the same technique according to King. Gertchen Hirsch, on a recent episode of It's Sew Easy, just like King defined the terms interlining, underlining and flat-lining as being interchangeable.  

However, my 1980 edition of Vogue Sewing refer to interlining and underlining in different terms. According to Vogue Sewing, underlining is "fabric joined in garment seams to give inner shape or support" (31). Interlining is defined as a "layer of fabric between lining and underlining for warmth" (26). The Vogue Sewing book made no reference to flat-lining.  

My copy of Reader's Digest Complete Guide to Sewing defines interlining and underlining much in the same manner as my Vogue Sewing book. Again, there is no reference to flat-lining here. I wonder if flat-lining is a relatively new term?  


This technique is totally new to me. I working on a vintage Vogue 2103 - a Sybil Connolly design, circa 1969, and underlining the dress is part of the Vogue pattern instructions.
Working on a flat surface, pin underlining to wrong side of each matching fabric piece.  Baste through all symbols and along all lines of construction separately, leaving both ends of thread free for easy removal.  
I'm basically basting the organza to my fashion fabric and treating it as one. Even the sleeve is designated to be underlined. In this project, the underlining will not only add structure to the fashion fabric but it will fill out the gathers and pleats found in the dress. Yes, there are pleats found in this dress. Can you guess where? Besides the two at the back shoulder seam there are also four hidden in the facing. A total of ten darts are part of this dress pattern.  

Underlining holds the promise to improve the look, hand and functionality of the fashion fabric. It will help the garment resist wrinkling (gotta love that!) and help a garment to keep its shape longer. I already love the way it drapes and feels with the underlining basted in place.

Now even though it is a new-to-me technique, underlining has been part of quality garment-making for quite some time. We all know that interlining is often applied to tailored garments but Chanel applied this technique in a special way.
Among the older generation of couturiers, Chanel stands out as a craftswoman who applied the very highest standard of finish to her clothes. Those neat little suits owe as much to superb tailoring as they do to the talented designing. Every example offers a new special tip that could well enhance another garment. For example, her light mohair suits were fully interlined with silk chiffon, very carefully and lightly mounted to the fabric to give a delicate extra substance (Kennett 58).
There are many different types of fabric that you can choose for underling a garment. Just as with interfacing you want to choose a fabric that will work with your fashion fabric to give it the amount of structure that you want to achieve. Common underlining fabric choices can range from silk organza, cotton batiste, siri cotton, rayon challis, cotton flannelette, wool felt, wool flannel, bump cloth and even muslin. 

The Vogue dress I am currently working on is underlined with a nylon organza. It has a bit more structure than silk organza and seems to be working well with the suit weight fabric that I have cut as my fashion fabric.   

Some resources suggest cutting out your underlining first and and then your use your underlining to cut your fashion fabric.  I found a Threads article that suggest basting the interlining to the fashion fabric before it is cut. The article noted that "this is much more accurate than cutting the fashion fabric separately" (42). I did not cut my underlining first nor baste it prior to cutting my fashion fabric just because I did not have the work space to so. I cut my fashion fabric first then the underlining separately using the same pattern pieces. I then pinned them together and basted. It worked out fine.  

Even though my layers are basted together, I opted to use a walking foot. I'll admit that I did have a bit of fear that things might shift as I'm sewing. The walking foot, if anything, gave me some added comfort as I sew.  

Do you have any other underlining tips?  

____

Vogue Sewing.  (Butterick Fashion Marketing Company.)  New York:  Harper & Row, Publishers, Inc., 1980.  Print.  

Kennett, Frances.  Secrets of the Couturiers.  New York: Exeter Books, 1984.  Print.      

King, Kenneth D.  "You Say Underlining, I Say Interlining: By any name, it's a good way to support fabric."  Threads March 2008: 40 - 43.  Print.   

Reader's Digest Complete Guide to Sewing.  New York:  Reader's Digest Association Inc., 1982.  Print.  


Wednesday, 26 February 2014

Some of My Favourite Resources


Share a free pattern, share some vintage sewing resources, share a tutorial or share some great sewing resource links!
Here are some of my favourite sewing resources and links:

Invisible zipper:

Eugenia hasn't blogged in over two years but she's still listed in my blog roll because of the information she has posted about invisible zippers. You can find this information here.

There is also Norma Bucko's article, Sew Invisible Zippers Like a Pro, which appeared in Threads August/September 2011. I have to admit there are several Threads magazines that are part of my go-to resources and this article is a real gem. Not only does Bucko state the benefits of using an "invisible zipper foot made specifically for your sewing machine" she also demonstrates that there is no need to fear if you can not find one at your local sewing machine dealer. Bucko has detailed instructions for installing an invisible zipper with a standard zipper foot. Don't have a hard copy of the September 2011 issue number 156? Don't fret, you can find it online if you are a Thread's insider.

Hand-picked zipper:

I've book-marked this site on my computer because this is a technique that I would like to try.  Neeno over at Sew Me Love has a wonderful tutorial (Good-bye Invisible Zippers & Hello Handpicking!) on hand-pick zippers and she has the most beautiful photographs too.

Gussets:

My favourite tutorial for gussets is found in a sewing pattern, Vogue 1043. The pattern comes with excellent instructions for this style feature.

And I really do consider my 1980 copy of Vogue Sewing as one of my most valuable sewing resources. Vogue Sewing has good instructions and information about gussets. Between my Vogue Sewing and Reader's Digest Complete Guide to Sewing I can find the answers to most of my questions by the turn of a page. I can't recommend enough how valuable a good resource book has been to my sewing.

Underlining:

I love vintage sewing patterns because back-in-the-day dresses were underlined!  I find vintage patterns a rich resource for not-commonly-used sewing techniques.  Even if I don't use the pattern, I often find the instructions a rich source of information and inspiration.

Gertie did a segment on underlining skirts on the program It's Sew Easy. You can view it here.

Well, those are some of my favourite resources.

Happy Sew Grateful Week!

Saturday, 2 November 2013

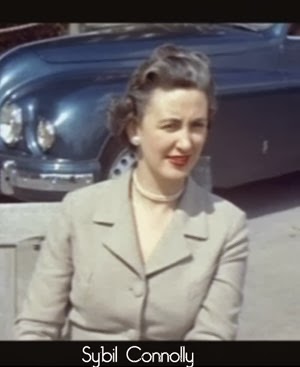
Who is this Sybil Connolly of Dublin?

Who is this Sybil Connolly of Dublin?

To be completely honest until a couple of months ago I knew nothing of Sybil Connolly. I find this shocking since I am an avid Vogue pattern sewer and love vintage patterns. And she is someone who designed for Vogue Couturier Design line of patterns. How could I have missed this talent all these years?  

I only recently discovered Sybil Connolly's designs when shopping over at Etsy. I stumbled across Vogue 2103, circa 1969, and immediately fell for this A-lined dress pattern. The pattern description does not do it justice, simply stated as  "[s]emi-fitted A-line dress has front yoke gathered to shaped inset band. Short sleeves and jewel neckline." This pattern is much, much more!  

There is no mention of the dart shaping on the inside of the dress or the underlining. Details the give a garment the look and feel of quality and exquisite shaping.  

The pattern flap only hints at the details that are hiding inside the pattern envelope.
SYBIL CONNOLLY, the leader of the Irish couture, has merited widespread recognition and publicity beyond the realm of her native Ireland.  Unassuming at first glance, her clothes are famous for every design ingredient put into them . . . from their shape-minded silhouettes to their perfection of detail and proportion.  
I can't wait to get behind the sewing machine and piece this together. But there will be little details to take care of first. This will be the first dress that I underline and I have a synthetic organza that is a close match to my fashion fabric. Don't gasp, silk organza is not in the budget at this time and the synthetic organza seems like it will work nicely. [Fingers crossed.]

I'm quite excited to work on this project especially now that I have been discovering more about this designer. The dress will be part of my Tim Gunn's 10 Essential items, number two, the day dress.

What is on your sewing table?


  Happy Sewing!  

Saturday, 17 November 2012

Teal Traina Dress

This lovely pattern showed up in the mailbox on Friday just to cheer me up after a really bad week. For a brief moment, it was lined up as my weekend next project.

There is no way that I can get this one done in a weekend. I wish!

Now, I'm wondering if I picked a pattern that is out of my league?

Confession time.  In all my years of sewing,
  1. I have never made bound buttonholes.  
  2. I have never underlined a garment.  
And my research into Teal Traina revealed that a Teal Traina garment was known as a quality garment with couture details.

Of course, I discovered this after I purchased the pattern. And now, it would be just wrong if I tried to cut corners with this beautiful pattern. What is a gal to do? The only thing that I can do, I guess. Have someone else sew it for me.

I'm kidding. I'm going to take the plunge and learn something new, bound buttonholes and the mysteries of underlining. I'm also going to put off this project until Christmas break when I will have more time to focus on the time-consuming details that make this dress so special.

I did open up the pattern and give it a good pressing. The pieces have been cut with pinking shears! The etsy shop seller did mention it in the advertisement but I have to admit I was a wee bit shocked when I discovered that it was actually true.


The extension for the pocket were cut off on the skirt front pieces. But with the help of the instruction illustrations it shouldn't be too much trouble to fix.

Other than a few small tears here in there the pattern pieces are in fairly good shape. I think that I will copy this pattern since it is a lovely one that I would like to hold on to.

I think I also found my fabric for this dress. It is a crepe fabric and even though it appears as a blue/teal colour, it is more on the green side. Sorry, it is a bad photo.

A trip to Mitchell Fabrics might be in order to pick up silk organza for the underlining fabric. And I will for sure use a non-fusible interfacing.

This project will involve much more hand-stitching than I typically put into my garments but I think it will be worth the work.

Thirty-three more sleeps until Christmas break and the start of this project.

Now, I should get back to clearing off my sewing table with the projects that I've already started and have cut out and ready to go.

Happy Sewing!


Stash busting: White Linen Shorts / Vogue 9191

I actually made something appropriate for the summer season and the heat.  Well, I actually did start off the month sewing a linen dress.  N...