Thursday 21 June 2018

Vogue 1455: Revisiting a Favourite Pattern

Recently, Lynn Mizono's reversible dress pattern made it onto the cutting table this week. The biggest challenge became the decision on fabric. I chose a navy and white Japanese cotton for one side and then a white and black cotton combination for the reverse side, which was quickly nixed in favour for this colourful combination.  Moms know best.  

Top L to R (clockwise):  Green swiss dot cotton, floral print cotton, 
purple eyelet cotton and Liberty print cotton.  
And the little gal's Mom was right because happens to turn out to be one of my favourite combinations.  All of the fabrics were pre-treated with a tumble through the washing machine and dryer and a good steam press prior to cutting. Do you pre-treat your fabrics? 


What I really like about this fabric combination is that the ribbons can be changed to pick up on any number of colours featured on both sides of this dress.


Let's talk about this pattern!  


This pattern, Vogue 1455, is an American designer pattern. And it mimics the adult version, Vogue 1410, of this design. The only difference is to the basic shape that has been divided to create a contrasting bubble hemline effect. This creates a hem band that allows for adjustable lengths and for growth spurts. Gotta love a flexible pattern! This is an easy very easy make and can easily be made in an afternoon including cutting time. This is the first time I made one in the largest size, size 8, and I do think it's just as adorable as the smaller sized versions. But I might be a wee bit biased in my opinion. Most important, it's a fun project.  


The Stats:

Fabric:  5 metres

Ribbon:  2.4 metres

Buttons:  4  

PatternVogue 1455

Additional Tools & Supplies:  Iron, ironing board, cutting table, scissors, pins, measuring tape, tailor's chalk, thread clippers, sewing machine, buttonhole foot, walking foot, seam ripper, serger, tweezers, threads, hand needle, and a cup of chai tea.  

Happy Sewing!  


Wednesday 13 June 2018

Happy National Sewing Machine Day!


Oh yes, the sewing machine.  Our much loved tool we use in our creative lives.  But did you know that this machine hasn't always brought joy. Back-in-the-day, 1790, the first patent for the sewing machine was granted to an English cabinet maker whose machine mimicked the motions of hand stitching. Other patents followed as the design elements of the sewing machine changed. Decades later in France, a tailor patented a machine that he used in a factory that made uniforms for the French army.  Displaced tailors caused a riot which resulted in the machines being destroyed and nearly killing the inventor. Thankfully, many others followed to improve on the design of the sewing machine and new patents emerged which lead the way for the home sewing machine. Okay, I have left some key details out, but if your interested in learning more I do suggest this read.  And if you're lucky enough to spend some time with your sewing machine.  

Happy Sewing!  

Monday 11 June 2018

McCall's 7630: Just What I've Been Looking For!

I have this vintage cotton skirt that is perfect for the warm summer weather but it hardly sees the light of day because I struggle to find a suitable top to wear with it. 


Until now, McCall's 7630, a loose-fitting pullover top pattern just happens to be what I've been looking for. And there's some raw silk that was sitting in my stash that was perfect for the project.  


I'm really thankful that this weekend all of the new patterns that I tried out worked. I read review of this pattern that others wished they added length to this pattern so to caution on the safe side, I added an inch to the hemline. And then I removed the added length. The original length on me was perfect.


The only change I made was take advantage of the many options that come with this pattern.  I basically used view B with view E's back.  

The Stats:

Fabric:  1.3 metres

PatternMcCall's 7630

Additional Tools and Supplies:  Iron, ironing board, cutting table, scissors, measuring tape, pins, pin cushion, sewing machine, thread, tailor's chalk, seam ripper, serger and more thread.  

Happy Sewing!  

Sunday 10 June 2018

Orange is my New Dress!

This is my version of the Lily Linen Dress by Tessuti Patterns.


I made it in an orange coloured linen fabric because like Frank Sinatra once famously noted, "orange is the happiest colour."


And check out the pleating details at the hemline. It was the reason I was drawn to this design. I'm really happy with how this pattern turned out because this is the first try at this pattern. I know, a toile made out of linen, crazy! Thankfully, it worked out and I ended up with a wearable toile.  

I adore everything about this pattern from how it was packaged, it's perfect drafting, and oh my goodness, the fit! This is one comfortable dress. And can I just add that it's nice to make something without an armhole that is dropping a quarter-way down my arm? It came together easily, even though I didn't closely follow the instructions. Tessuti patterns call for a half inch seam allowance. I sewed a 5/8" allowance at the shoulder and side seams but used the recommended 1/2" allowance at the armhole. It worked out fine.


I also made my bias binding into a seam binding instead of folding it in half and opted out of stabilizing the neckline before I sewed the seam binding in place. The pockets were cut but as I was sewing the dress together I left them off. I know, I can't believe I just wrote that either. I figured the patch pockets gave it a more casual vibe and I wanted this dress for work. The last change to this pattern was the length. The pattern pieces instructs an additional two inches to be added to the hemline. Also omitted considering my height. On me it looks a little longer than on the model's photograph but I'm good with it. It's a very comfortable dress. Gotta love that even if it doesn't have pockets.   


The Stats:

Fabric:  2.5 metres

PatternTessuti Fabrics Lily Linen Dress

Additional Tools, Supplies & Distractions:  Cutting table, pins, pin cushions, scissors, tailor's chalk, thread clippers, sewing machine, walking foot, regular presser foot, iron, ironing board, seam binding maker, Burda tracing paper, pencil, ruler, measuring tape, seam gauge, audio book playing in the background and occasional breaks to fit in some housework and errands.  

Happy Sewing!  


Saturday 9 June 2018

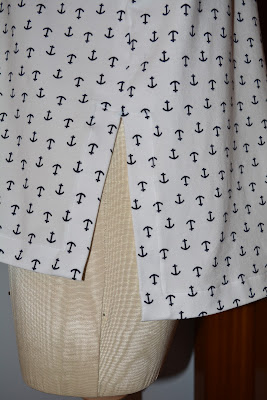
Nautical Tee-shirt

Simplicity 8529 became my go-to pullover sweater pattern this winter.  Now, it seems like it may also become a go-to t-shirt pattern. Just a little Knit-N-Stable tape at the hemline to give it a nice, clean finish and it ended up an easy make. 


This is a super easy project. It's a size medium but I could have gone for a size small this time. Something to keep in mind if I revisit this pattern.  I did shorten the sleeves more than the other versions.  


And unlike any long sleeve t-shirt I would find in the ready-to-wear landscape, these sleeves fit. The nautical print and contrasting neck and wrist bands are a cotton knit. Needless, to say, this is one comfortable t-shirt.  


The Stats:  

Fabric:  1.4 metres 

Interfacing:  1.5 metres of Knit-N-Stable fusible tape

PatternSimplicity 8529

Additional Tools, Supplies & Distractions:  Cutting table, scissors, tailor's chalk, Burda tracing paper, pencil, sewing machine, thread, walking foot, serger, more thread, an episode or two of procrastination, iron, ironing board, hand needle, thread clippers, and seam ripper.  

Happy Sewing!  

Cotton Summer Dress: Butterick 6784

Ever since I made this version of Butterick 6784 last summer, I was smitten over this kAtheRine Tilton design with its Lagenlook vibe.  I ...