Wednesday, 31 May 2017

Me-Made-May Round-up

So the big question is how did I do with this year's Me-Made-May pledge.
I Graça, of Sew Essentially Sew, sign up as a participant of Me-Made-May 2017.  I plan on being more mindful of the fabrics that I chose to wear, the environmental impact of my sewing decisions, and to pass along the clothes that don't fit and replace them with items that reflect my life-style and values.  
Be more mindful of the fabrics that I chose to wear.  

I feel that I can check this one off as accomplished, even though it is a work in progress. The fabrics that tend to last and look the best after several wears and washes are those with natural fibre content.

In the news there has been reports on how micro-plastics have been polluting our waters and wildlife. It is not just from discarded water bottles and plastic food wraps or plastic bags, fleece fabrics have also been singled out. The fabric choices that I make as a consumer have a far reaching impact beyond my sewing workspace and closet. It is not only fleece, the shelves at fabric stores are filled with dubious fibre content labels. The California Proposition 65 labels appear here on clothing and handbags found in the retail landscape. I just wish that it applied to fabric sold in the fabric stores and that we had a similar system here in Canada to help consumers make informed decisions. Even without these labels, I know that I prefer natural fibres and more of my sewing projects are reflecting this bias.

Be more mindful of the environmental impact of my sewing decision.  

This is an ongoing learning process. This goes beyond choosing the "right" or ethical fabric. I have to constantly be mindful of the waste that goes on during the cutting process. I tend to collect a lot of scraps and I have to remind myself that yes, one person's trash is another's treasure.


I collect piece of fabric to donate to my school teacher friends for craft and school projects. When I worked at a school and ran the sewing club, some of the older students used to come to me to ask if I had a "piece of fabric" because they forgot to bring some and it was a shops day. And you should have seen how thrilled the students were when I brought in a collection of fabric pieces. They would create toys for their pets, headbands, and bracelets. It was great to see how excited their creative minds were at the sight of craft supplies. And I should be more careful with how much fabric I buy to cut down on the left-over scraps that are left behind. I'll admit that I tend to pick up a little more than what I typically need for a project, "just in case."  

Part of the sewing process entails pre-treating the fabrics before I cut out a project. I realize that the way I chose to prewash and shrink my fabric also has an environmental impact. I've noticed that vintage sewing books offer pretreatment solutions that are less harmful to the environment than the methods I sometimes use out of convenience.

Pass along the clothes that don't fit.  

Check, but it is also an on-going progress.

Replace the clothes that don't fit with items that reflect my life-style and values.  

Again this is an on-going process. I didn't take daily photos of what I wore during the month of May but I can tell you that everyday is a me-made-day. During the month, I wore more trousers than I did dresses which kind of shocked me. I don't own any RTW trousers for the simple fact that I can't find any that fit. I could use more and this month I found a wonderful bias cut pattern that I just need to tweak the fit and I'll be working on the next few weeks. And there is one more tee-shirt on the cutting table.

Well, that's my Me-Made-May 2017 round-up. I won't say, until next year because what I've learned from this year is that it's an on-going process and everyday is a me-made-day.  

Happy Sewing!


May in Review...

Sewing:


My sewing focused on my Me-Made-May pledge to clean up my wardrobe of all those ill-fitting garments that were taking up room in my closet and drawers. I'm not a hoarder, so why am I holding onto these things? Oh, did that sound like denial? Oh yes, denial! There was that belief that I would lose weight and return to the size I was back-in-the-day.

Clockwise L to R:  Multi-coloured polyester knit top, Vogue 9057; yellow polyester top, Vogue 9057; burgundy cotton knit top, Vogue 9057; multi-coloured polyester knit top, Vogue 9057 (first muslined copy); digital print cotton top, Vogue 9057; graffiti print rayon/lycra top times 2 (second version not shown here), Vogue 9057; bias cut wool pants, OOP Vogue 8887.

There were tee-shirts labelled "small" but for some reason they were still hanging around [denial]. So my Me-Made-May quest was update my wardrobe with clothes that fit and that I can actually use. In the progress, Mama R became impressed with the Marcy Tilton top pattern as well and I ended up making more for her as I perfected the fit. I experimented with the polyester knits in my stash before I committed to cutting into the cotton knits. I'm ready now and there's actually a taupe cotton knit version on the cutting table so I will have something to go with this skirt which has been waiting for something to go with it.    


RTW & Fabric Fasts:

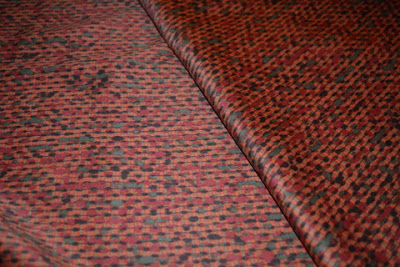
I don't think I picked up any fabric this month... no wait, there was a metre of printed linen on my last trip to Mitchell Fabrics. My bad. Oh and there was some lining fabric. Yeah, I failed at the Fabric Fast for the fifth consecutive month. I did well on the RTW fast though. It is getting easier now that my sewing skills are improving and I've found some good techniques to achieve the look I want out of my sewing projects. [singing the praises of Knit-N-Stitch and basting tape].


The Stats:


Supplies
Quantity Used from the stash this Month 
Quantity Used this Year
Added to the Stash this year
Basting Tape

2.72 metres
0
Bias Tape
0.5 metres
3.6 metres
0
Buttons

28
42
Chain

0
0
Cord Stopper

0
0
Elastic
8.3 metres
6 metres
Fabric
14.2 metres
62 metres
52.5 metres
Fusible Tape
19.46 metres
31.46 metres
6 rolls
Hand needles

2
0
Hook and Eyes

0
0
Interfacing

5.3 metres
6 metres
Lace trim
2.6 metres
0
Pattern (new)
2
11
11
Pattern (previously used--TNT)
6
14
0
Ribbon
1.1 metres
1.1 metres
1.1 metres
Serger needles

0
0
Serger thread
1
4
12
Sewing machine needles
1
3
0
Snaps

5
0
Thread
3
12
18
Trim
2 metres
7 metres
Velcro

0
0
Zipper
1
5
5


Happy Sewing! 

Tuesday, 30 May 2017

I Wouldn't Let Her Steal My Tee-shirt

so I made her one.  


Mama R was quite impressed with how the Rayon/Lycra® fabric drapes with this design, Vogue 9057, and there was enough fabric left-over, so why not? I love my Mom but I wasn't willing to give her the shirt off my back, maybe figuratively speaking. 


This version is slightly different than the first. It still has a flare, but this one is flared 1/2" more.  The sleeves were lengthened 1" as well as the hem length.  I finished the neckline as I did on the others and that it. I can't believe I was able to squeeze out another tee-shirt from the left-over piece of fabric.  


The Stats:  

Fabric:  1.4 metres

Fusible Tape:  2.8 metres Knit-N-Stitch™ fusible tape

Pattern:  Vogue 9057

Additional Tools & Supplies:  Sewing machine, serger, walking foot, pins, scissors, thread clippers, cutting table, iron, ironing board, sleeve ham, tailor's ham and love (not enough to give the shirt off my back) but rest assure there's a whole lot of love that went into this project because when it comes down to it, I love my Mom.  

Happy Sewing!  


Sunday, 28 May 2017

Graffiti Print Tee-shirt

I made another tee-shirt with my tried and true (TNT) Vogue 9057. This time I went with a Rayon/Lycra® blend, listed as one of the recommended fabrics on the pattern envelope.


I typically avoid rayon fabric after having too many shrinkage issues with it in the past. It's the graffiti print that convinced me otherwise. I found this fabric at the now-closed Mitchell Fabrics last year and I sat on it wondering what to make with it ever since. I was sure to pre-shrink this fabric before I cut into it since my past issues with shrinkage happened with ready-to-wear pieces. I pre-washed the fabric in the washing machine on the regular cycle and then a toss in the dryer.  I don't plan on putting it in the dryer now that is sewn, it was only to help pre-shrink the fabric.

This one is now one of my favourites tee-shirts because it drapes beautifully and this fabric on my body makes the yellow striped version look frumpy in comparison. Even Mama R likes it and there is enough left-over fabric to make her one as well. 


I made basically the same changes to the pattern as the others. I raised the neckline 1" all around and eliminated the neckline band. Instead of the neckband, I used Knit-N-Stretch™ tape around the neckline, finished the edge, turned and topstitched in place. There was an inch and a half width flared out at the side seam. 


The Stats:  

Fabric:  1.4 metres

Fusible Tape:  2.8 metres of  Knit-N-Stretch™

Pattern:  Vogue 9057

Additional Tools & Supplies:  Sewing machine, serger, walking foot, cutting table, pins, scissors, thread clippers, iron, ironing board, tea break, stretching breaks, and some good tunes.  

Happy Sewing!  


Saturday, 27 May 2017

In Sewing News Today...

I have a new book that I'm excited about reading, The Pattern Artist by Nancy Moser. I do believe that it will compete with my sewing time when I have some free time. 


I found it mentioned in the new Vogue Pattern magazine but had a hard time to find it. Would you believe it was in the Religion section even though the description reads more like a historical fiction? I guess I'll discover what that's all about once I finish this read.  

✄ ✄ ✄

This month Pattern Review currently is running "The Upcycle Contest" and earlier this month it had me thinking about the collection of old men's wool suit jackets that I have hanging in a closet. I picked them up at a second hand store awhile back and to make bags and backpacks for the Etsy shop. I stopped because they weren't selling as I hoped and didn't cover the cost of materials after adding all the hardware and interfacing to the cost. But this contest had me thinking about a photo I came across on National Tweed Day.   

Vivienne Westwood tweed jacket.
{source}

Now, I'm thinking about making my own version of a colour-blocked tweed Vivienne Westwood inspired jacket and using up those left-over suit jackets. In my pattern collection I came across OOP Burda Style 7304. I made the coat version a couple of years ago. Sadly, I cut the pattern pieces and to be honest, the coat fits a little snug and I typically wear it open. I was lucky enough to find another uncut copy of this pattern.  


It is on it's way and even though it won't make it in time to be sewn up and entered in the contest it won't stop my creative juices from wanting to get to work on it when it gets here. I like how this jacket is cut and think it would work with colour-blocking various tweed fabrics. This will be on my want-to-sew summer list, maybe I'll have it done in time for autumn.  

✄ ✄ ✄

The Etsy shop now has fabric up for sale. I'm letting go of some of my treasured fabric and hope that these pieces will find a good home where they'll be made into fabulous garments and bring joy the artist that works with them. Times are tough when it comes to letting go of my sewing supplies.  


I have 2.6 metres of this knit fabric for sale.  It is so soft to the touch and I used this fabric to make McCall's 7541. There is enough fabric to make another version of the cape top.  If you purchase all of the 2.6 metres length and leave me a comment that you read about it on the blog along with your fabric order, I'll even throw in the pattern. The pattern has been cut to a size 14.  


Here is a lovely polyester that I picked up to use as a lining fabric. It would be great for clothing as well, perhaps a dress or top.  It is 115 cm wide and there is a total of 4.1 metres.


This is a light-weight, semi-sheer cotton that would be perfect for a summer dress or top. Or maybe a nightshirt or pyjamas? It is also 115 cm wide and there's 4.4 metres of this fabric.  

Stay tuned for more fabrics to appear in the shop.  

Until then, happy sewing!  


Thursday, 25 May 2017

OOP Vogue 8887: Cuffed Trousers

This is my test garment of out-of-print (OOP) Vogue 8887. There is so much that I like about this pattern. First off, the fabric is cut on the bias and wow! I've already sang the praises of bias cut garments here so I'll spare you from any more on this post.

The ribbon finished waist is the cat's meow. And I have a pair of cuffed pants! I've always dreamed of cuffed pants. So, the question remains, do I now feel like a 1940s trouser-wearing movie starlet?  

Almost.  

Well, if I have a big white shirt to cover my mid-section and the pulling at the lower pocket edge then yeah, maybe. It's all about creating an illusion, right? That's right, I have not perfected the fit just yet. I can get away wearing it if carefully paired with a strategic garment but I am sure I can improve the fit.

Modelling Vogue 8887 with a puffed up allergy face. 

I like the ribbon waist and that is a feature I will keep. The waist size I might go up, it fits snuggly, I would just like a little more ease in this area. I need to figure out what I want to do about the pockets since they are not helping with my full hips and thighs. The vertical pockets on the front side gap open. I'm thinking about eliminating them. But then I have similar pockets on my OOP Vogue 1325 trousers and they don't gap like these do, hmmm. More ease will be given in this area as well. To go along with my full hips and thighs, I also have a tummy. Yeah, now you have an idea why pants are a challenge. This means that low-rise pants are a no-no and even though OOP Vogue 8887 are not low-rise the front waist sits 1/2" below the waistline. I wasn't going to have any of that so I raised it 1/2" and it's perfect. I really like all the darts, there are four in the back and two in the front. They are a keeper. The crotch length is cut as a size 14 and the inner thigh is cut at the largest size. The side seam is cut as a size 16, maybe a 1/2 size more might give me the perfect amount of ease. And the finally, the cuffs. Don't get me wrong, I love a cuffed leg despite reading that wide legged cuffs are to be avoided for petites but the length, look at the length compared to the pattern photograph.


The trousers on the Vogue model seem to fall closer to ankle length, on me they look capri length. The pattern piece wasn't shortened so next time I'm going to lengthen the legs. Since these are small cuffs I don't think they make me look shorter and I wouldn't mind making it a full length leg. I did however have to shorten the right leg length by 1/2" to make the hems appear even. It is a consistent adjustment I have to make with trousers.  

So, I'm well on my way to making the trousers I want. Until then, it's back to the drawing board to make some changes to the pattern.  


The Stats:  

Fabric:  2 metres 100% wool suiting and 0.3 metres of lining fabric

Zipper:  8" invisible zipper

Basting Tape:  16" two-faced basting tape

Ribbon:  1.1 metres of 1 1/4" grosgrain ribbon

Additional Tools & Supplies:  Grid board, cutting table, pins, scissors, sewing reference books, sewing machine, serger, tracing paper, markers, pencils, threads for the sewing machine and serger, silk thread for hand stitching, tweezers, seam ripper, tailor's ham, pressing mitt, iron, ironing board, walking foot, invisible zipper foot, regular zipper foot, hanger, many breaks, chai lattes and some good tunes.

Happy Sewing!


Monday, 22 May 2017

The Genius Behind the Bias Cut

Out-of-print (OOP) Vogue 8887 has become more than sewing a pair of trousers. It's an act of slow sewing. I just want to sit and reflect how beautiful the bias cut fabric looks as it's being sewn. Who knew a simple wool could look so exquisite when cut on the bias?  


When I first found this pattern (circa 2013) I had no ideal that all of the pieces (jacket, skirt, top, and trousers) were cut on the bias. The placement of the plaid on the orange and yellow jacket should have been a clue. Other than that, there was no mention of it anywhere on the pattern envelope. Maybe that was intentional on Vogue's part? Bias cut garments seem to have a reputation. 

Madeleine Vionnet
{Source}

They are nostalgically admired and associated with the creative artistry of Madeleine Vionnet's work in the early 20th century and sometimes feared in our modern sewing spaces. It doesn't help when modern sewing books refer to sewing bias-cut garments as "challenging." Nothing like reinforcing the fear of the bias. So what is the bias?  

Bias refers to the grain of the fabric. According to Madeleine Vionnet, there are actually three grains found in a piece of fabric: the crossgrain, lengthwise grain and the bias. Yet some resources argue that the bias is "not technically a grain."  

Photo credit:  Threads Magazine
{Source}

Cutting a garment on the bias is all about finding the true bias. The true bias refers to a 45 degree angle from lengthwise and crossgrains. And this is where slow sewing plays a key part in bias cut garments. Before you can locate the true bias you have to prepare the fabric for locating the crossgrain by either tearing on the crossgrain or pulling a thread and cutting across the open space left by the missing pulled thread. Now the fabric can be laid out so the crosswise and lengthwise grains are at perfect right angles. This will help to find a fabric's true bias. 

If you understand the qualities that bias cut garments offer and take your time to find the true bias you will have greater control of this fabric cut and it is worth it in the end. Bias hangs thinner and longer giving a slimmer look than straight and crossgrain cut fabric, it doesn't ravel or wrinkle and it drapes softly over the body. And there you have the genius behind the bias cut. But there are some pointers to take note of that I couldn't find mentioned on the Vogue instruction sheets that came with OOP Vogue 8887.  This could be why this pattern is rated as "average" which Vogue Patterns defines as:
These patterns are perfect if you have more time to sew, and more experience sewing. Look for challenging designer techniques, tailoring, unique construction details. Expect more fitting and inner construction. Find more variety in fabrics from the stretchiest knits to synthetic leathers and suedes. 
Considering that all of the patterns are for bias cut garments, I'm surprised that this pattern is not rated advanced. Now, don't let me scare you off of sewing bias cut trousers because they are divine. Right now they are hanging until tomorrow when I'll finish off the hem. But there was some useful and insightful information that I found in some of my sewing books.  

All of my resources mention that you should stretch bias cut fabric as you sew although there were various methods. Vogue Sewing suggests stretching the fabric slightly as you stitch over tissue paper so that the finished edge will hang correctly. This is to prevent puckering. The Sewtionary echoes suggestions to stretch the fabric slightly and even suggests that bias seams can be stitched with a narrow zigzag stitch. Couture: The Art of Fine Sewing offered the most comprehensive instructions on machine sewing a bias seam. Unlike the previously mentioned resources it instructs that the fabric be stretched "as much as possible without using force[!]" What I really appreciated with these instructions is that Roberta Carr took the time to explain why things are done a certain way making it all make sense to me rather than just reading instructions. I really do recommend this book if you can find it. The instructions also differ in that it suggests stitching five to ten inches, stop, then lift the press foot in order to let the fabric settle to help maintain the grain. So what did I do?  

I took all the suggestions in consideration and used my walking foot to construct most of the seams (exception: installing the zipper). I did stretch slightly as I sewed and stitched for short distances, stopped, raised the presser foot and repeated the process. 
   
Another important piece of information I want to pass along is that bias garments should not be hung during construction. I often put unfinished work on my mannequin or draped over the edge of a chair or table but with this project, I took care to lay the unfinished pieces flat on the cutting table.  

Right now my trousers are almost finished but there is one important step that all of my resources agree on. Completed bias garments should hang for twenty-four hours before hemming. And that is where I'm at, admiring the genius behind the bias cut as the trousers hang in preparation of the final step.  

Happy Sewing!  


Resources:  

Carr, Roberta.  Couture:  The Art of Fine Sewing.  Palmer/Pletsch Publishing, 1993.  

Kennett, Frances.  Secrets of the Couturiers.  Exeter Books, 1984. 

Levine, Betsy (ed.).  Great Sewn Clothes:  From Threads Magazine.  The Taunton Press, 1991.  

Musheno, Elizabeth J. (ed.).  The Vogue Sewing Book.  Butterick Publishing, 1975.  

St. Germaine, Tasia.  The Sewtionary:  An A to Z Guide to 101 Sewing Techniques & Definitions.  KP Craft, 2014. 


Saturday, 20 May 2017

In Sewing News Today...

I got out of the house today despite dealing with pain in my back. It kept me from the sewing room but I did make it out for some grosgrain ribbon for those Vogue 8887 pants that are taking me forever to get to. I grabbed my pattern envelope thinking that I could reference it when I got to the store as to how much ribbon I'll need and that didn't quite work out as planned. OOP Vogue 8887 pattern envelope instructs you to see the instruction sheets for notions! Really, Vogue? I'm sure in the space it took to write that, Vogue's technical writers could have easily listed how much grosgrain ribbon we need to pick up. With the pattern instruction sheets on the cutting table at home and Vogue 8887 being an out-of-print pattern, I just had to guesstimate the yardage. Next time, I'll make a list.  

Sewing wasn't in the cards today, maybe tomorrow. But while I was out, I stumbled across some vintage sewing books. 

 
They are Woman's Institute of Domestic Arts & Sciences books from the 1930s. The three that I have are Pattern Designing, Principles of Tailoring, and Dressmaking Trimming Finishing and they are a treasure of information. I can't wait to explore the written words of wisdom and pour over the vintage illustrations. 

In other sewing news, today was the final day that Mitchell Fabrics would be open to the public and I couldn't bare to walk in there and see all those bare walls. ~sigh~ I'm going to miss that place. The last time I was there, a few weeks ago, the basement was completely emptied and most of the main floor was filled with a lot of empty tables. 


It is sad to see and read about so many fabric stores closing not only here but other places as well. And yeah, I know we can always buy fabric and supplies online but it's not the same. On my last visit there I picked up the last bit of an animal print linen that is enough to make an off-the-shoulder top. I can honestly say that if I didn't run my fingers through that linen fabric, I don't think I would have been tempted by just looking at an online photo of it. I'm really going to miss that place. But I'm really happy that I got to experience shopping at such a wonderful fabric store.  

Well, that is all in sewing news today... 

Happy Sewing!  


Saturday, 13 May 2017

Tackling My Biggest Sewing Challenge: Trousers

Of all the garments that I have made only 5% have been some form of trousers, pants or shorts. These leg covering garments include culottes, shorts, jumpsuit, elasticized, and my much-loved OOP Vogue 1325 raised-waist trousers and have been sewn for either myself or others. If I were to only count trousers I've made for myself that only account for 2% of my makes.

I would wear more trousers if I can break the fitting code on this type of project. And this is my next Me-Made-May journey, trousers.

I Graça, of Sew Essentially Sew, sign up as a participant of Me-Made-May 2017.  I plan on being more mindful of the fabrics that I chose to wear, the environmental impact of my sewing decisions, and to pass along the clothes that don't fit and replace them with items that reflect my current life-style and values.  

I should confess that my wardrobe also has a pair of ill-fitting trousers that I haven't been able to part with (until now) because I made it and searched high and low for needed supplies. I'm looking at you, Vogue 1507. This is a perfect example of falling for a beautiful designer look that doesn't really do my petite pear shaped body any favours. It was an error in style choice, not any flaws on the pattern's design.

Vogue 1507 was not doing my pear shaped figure any favours.
The crotch sat a little low because it was loose around the waistline. Add to that my curvaceous hip and thigh area doesn't lend too well to a tapered leg or the opportunity to properly adjust that waist. It is all good because these pair of trousers have taught me a few things that I hope to use on this trouser making journey.

I have a small waist measurement compared to my hip measurement. Most of the time when I've tried on RTW trousers or tried to make my own, I have an issue with the waistband.  The waist will stick out and doesn't properly sit on my body. According to some research, contour waistbands should work with this issue. But I once made OOP Vogue 1309 which has a contour waistband and it didn't turn out quite how I hoped. I might consider another pattern instead of re-visiting Vogue 1309.


Vogue 7881, from Claire Shaeffer's Custom Couture Collection, has a contour yoke. This might be a possibility. And it's sized for Misses' petite, at just over five feet, I could use a petite sized pattern. And it has a European cut. To be honest I had to research what this meant. An European cut refers to a longer rise compared to a low rise typically found in North American trouser styles. And according to research, a person, like me, with a smaller to hip ratio would benefit from an European cut.

And I have thighs, fabulous full thighs that present a challenge when fitting trousers. I have a copy of Sandra Bettina's Fast Fit:  Easy Pattern Alterations for Every Figure and it had some wonderful advice on this fitting issue and it worked like a charm when I made those Vogue 1325 pants. But, now that I want to try another pattern. I'll just have to remember that this worked on this pattern.

I mentioned that I'm also petite and apparently, that means that I should avoid wide leg trousers. But to heck with that!  
Katherine Hepburn, trouser wearing style icon. 
I want to look like a 1940s trouser wearing starlet. Except, I'm petite and the style icons that I'm thinking about were much taller than I am.  

Doris Day, circa 1948.
I would love to recreate that 1940's vintage look, just minus any pleats.  


And I have OOP Vogue 8887 is sitting in my collection of trouser patterns with that 1940's vibe I'm looking for without scaring me off with pleats. But these trousers are wide-legged, cuffed and have side front pockets, all design elements that a petite curvy lady should avoid.  

So, this is the plan. Work on Claire Shaeffer's Vogue 7881 and learn the "inside secrets of luxurious couture construction details" and then take that knowledge and apply it to OOP Vogue 8887. And maybe, if all goes well, I'll have my dream pair of pants.  


Happy Sewing!  


Thursday, 11 May 2017

One Last One!

It is time to pack away Vogue 9057 and move onto another challenge but before I do, I have one more to show 'n tell.  


This one is for Mama R and if the fabric looks familiar it is the same fabric I used for the very first one. This one far more superior from the first time I stitched it because of the fit. It is the number one reason to sew clothes, you can achieve a fit that you want (after a few tries, ha ha). 
There are several changes / alterations made to this top pattern:
  1. Straightened the hem, eliminating the hi-lo hemline.  
  2. Lengthened the sleeves, pattern piece 5 (view A), by one inch and stitched with a 5/8" instead of a 1" hem.
  3. Changed the neckline shape, adding 1" along the front curve and tapering to 3/4" at the centre back. 
  4. Omitted the sleeve band, pattern piece 4 (view A).
  5. Eliminated the neckband, pattern piece 3 (view A).
  6. Flared the sides by 2" from the hem and tapering to medium cutting line at the armhole.  
So this makes five versions of this top. I won't be keeping all of them. The first one doesn't fit around the neckline that way I like and the burgundy and this one are to be gifted to Mama R.  

Yellow top has a 1 1/2" flare, burgundy top has a 2" flare, digital print top has a 1 1/2" flare,
and the multi-coloured top has a 2" flare.  All have modified necklines.

The Stats:

Fabric:  2 metres polyester knit

Fusible Tape:  3 metres Knit-N-Stitch™

Pattern:  Vogue 9057

Needle:  Serger needle 90/14

Additional Tools & Supplies:  Cutting table, pins, tailor's chalk, rulers, measuring tape, sewing machine, serger, threads for the machines, scissors, thread clippers, tweezers, screw driver, iron, ironing board, and coffee.  

Happy Sewing!  


For Mama R With Love

It might seem that I'm stuck on Vogue 9057 this month but seriously, it is an amazing pattern. Even Mama R became smitten with the fit (not the colour) of this one. It's rare to find something that fits us in the armhole straight from the pattern without cutting the armhole in a smaller size. So, with Mother's Day just around the corner, I had to make her a couple of tops. Here is the first one. Like I mentioned she tried on the yellow one I made and liked the fit the best but she wanted additional length on the sleeves.  


I lengthened the sleeve pattern piece an inch but if I haven't already cut the second one I would have lengthened it two inches so that I could give it a 1" hem. This one has a 5/8" hem. Otherwise, this has the same changes that I made to my last one, raise the neckline an inch in the front and tapered down to three-quarters of an inch at the centre back. No neckband or sleeve bands were used. The hem was straightened, shortened, and flared at the side seams by two inches.  

Now let's talk about this fabric. I picked this cotton knit at Fabricland with thoughts of sewing a completely different project but I'm glad I abandoned those plans for this one. Burgundy is one of Mama R's favourite colours and what makes Mama R happy makes me happy, so I'm happy to use this piece of fabric for her top.  

This project came together like a dream without any issues sewing this fabric. I stitched the seams with the knit (lightning bolt) stitch on my sewing machine. The edges were finished with an overlock stitch on the serger. The neckline, hems, and shoulder seams were treated with fusible tape.  


The Stats

Fabric:  2 metres

Fusible Tape:  3 metres Knit-N-Stitch™

Pattern:  Vogue 9057

Additional Tools & Supplies:  Cutting table, pins, tailor's chalk, rulers, measuring tape, sewing machine, serger, threads for the machines, thread clippers, iron, ironing board, tailor's sleeve ham, coffee, stretching breaks and some really bad television playing in the background (iPod needs to be charged).

Happy Sewing!


Wednesday, 10 May 2017

One More!

I made one more version of Vogue 9057. This Marcy Tilton top pattern is quickly becoming a go-to staple.  


I made similar changes to this one as I did to the previous one adding a little more flare to the bottom hem.  Instead of a 1 1/2" flare, this one has a 2" flare on each side. I would like to go back to the sewing machine and add lined patched pockets. 

I found this fabric at Fabricland a couple of months ago as a remnant sized piece in a bin of knits. No idea what the fibre content is on this one as it was stamped "unknown." I usually turn away from these type of non-labeled fabrics but I was smitten by the texture and colour.

I do know that it handled the pre-treatment process well. Before I cut the fabric, it was washed in the regular cycle and went through the normal cycle in the dryer. No issues or noticeable shrinkage on this medium weight back-bonded knit. It even handled the heat from the iron relatively well when attaching the Knit-N-Stitch™fusible tape.

The top was constructed with the knit (lightning bolt) stitched and the edges were finished on the overlock (serger) machine.  


The Stats

Fabric:  2 metres

Fusible Tape:  3 metres Knit-N-Stitch™

Pattern:  Vogue 9057

Thread:  I finished off two spools of (previously opened) thread.  

Additional Tools & Supplies:  Cutting table, pins, tailor's chalk, rulers, measuring tape, sewing machine, serger, threads for the machines, thread clippers, iron, ironing board, stretching breaks, and some good tunes.

Happy Sewing!


Tuesday, 9 May 2017

In Sewing New Today...

McCall's released the summer line of sewing patterns last night and OH MY! I just had a flash-back to the nineties.  

Exhibit #1:  McCall's 7606

Yes, the bodysuit is back. I'm not making fun of this style because there was one of these (maybe two) in my closet, back in the day. I used to wear my RTW off-the-shoulder bodysuit underneath my OOP McCall's 5640 Jumper. 

{Source}

I remember I tucked under the shoulder of the jumper to get the full effect of the off-the-shoulder body suit look but it was a favourite oh-so-long-a-go. Oh what a trip! It seems like a life-time ago. It was a life-time ago! McCall's 7606 is a much-improved version of the 1990s bodysuit because it doesn't have those crotch snaps that can present some issues

Exhibit #2:  The Jumpsuit
Okay, jumpsuits did not originate in the nineties but they were certainly popular back then. And McCall's 7609 captures two trends in one look. Check out the illustration of version A, the floral romper totally screams the 1990s!

McCall's 7607 is another 1990s reincarnation of the jumpsuit / romper with a wider leg.  

Laura Tyler 1990's wide legged jumpsuit
{Source}
But wait!  There is more... 

Yes, McCall's 7598, another jumpsuit built for the leisure wear set. Mind you this one screams pyjamas to me.  

{Source}

But my 1990s jumpsuit love is for an OOP McCall's 6437 with the empire waist and fitted bodice. I've been searching for this pattern in my current size for years. It was a favourite make back-in-the-day. It would be wonderful if McCall's would re-release this NY Collection pattern but it looks like I might have to wait a few more decades before it is considered Archive Collection worthy.  

Exhibit #3:  The Casual Vibe

McCall's 7603 takes me back to the music festival scene of the 1990s where it was all about easy to wear long dresses, prints and look, plaid!  

McCall's 7604 is another garment seen on 1990s music festival scene with a nod to the seventies as well.  

McCall's 7610 is the pattern that I have on my sewing wish-list not so much for the fitted pants or the shorts. I really like view D the hooded top with the back detailing. But then I have enough exercise wear to keep me going.   

So, what did you think about the new summer release?  Any patterns making your want-list, or was the release all about nostalgia?  

Happy Sewing!  


Year in Review

Well, I guess I will start with some stats.  In 2024, I focused on two things, sewing from the stash and no more polyester.  Let's start...