Thursday, 7 July 2011

Have you ever...

Have you ever made something that wasn't working out and you just kept sewing trying to save it?

That would be my experience with Vogue 1185. I made it last year in a denim in a size that I typically sew using Vogue patterns.

I thought that the loose relax look of the jumpsuit would be perfect for the hot Winnipeg summers. Yes, it does get hot in Winnipeg. But I digress... I didn't realize how loose fitting it was.

Of course it was one of those times that I was so excited to make something that I didn't make a muslin.  My bad.

And then there is the fact that sometimes I forget that I'm actually five-foot-one. Like the time I chose this pattern with the model on the envelope who is likely six-foot-something without the three inch heels.

Back view buttons and red topstitching
I cut all the pieces and I took great care with the top-stitching. The red top-stitching on the dark denim looked great! I was pleased with how the sewing was progressing until it came time to try it on.

I kept sewing until it came for the placement of the pockets. I wanted to get the placement just right,  There are two pockets on each side of the jumpsuit, one smaller pocket (well, not really small) inside an oversized patch pocket. Oh my goodness.  I then realized that not only the pockets but also the jumpsuit was oversized, I don't know what I was thinking until then. The crotch was doing something funky, and the exaggerated armhole opening would never allow me to wear it without a tee-shirt or camisole underneath. And then I looked at my refection in the mirror below the dropped crotch line. Gasp!

The edge of the jumpsuit leg was touching the floor and I hadn't even sewn on the lower front and back pieces! After the initial shock and horror, laughter ensued as I tried to not to reached for a bottle of red wine.  
Front view 

Now was not time for wine, rather some intervention.  I corrected the funky-ness going on at the crotch area by tapering it off.  I cut the length on the jumpsuit and omitted the lower back and front pieces.  The adjusted length then allowed me space to add the leg band. And I omitted the outer patch pocket that would have just sealed the jumpsuit as a circus clown outfit with my body figure and short stature.

Despite all the horrors that I saw in the mirror when I first tried the semi-finished jumpsuit I kept working on it to try to see if it could be saved.


I'm glad that I did because I like the jumpsuit. I don't know if I will ever use the pattern again but I am happy that I didn't give up on it. I do wear it on occasion especially in the summer.

And it taught me a valuable lesson that I try to remember...

Always make a muslin!    

Wednesday, 6 July 2011

Skirts!

"Fashion is born by small facts, trends, or even politics, never by trying to make little furbelows, by trinkets, by clothes easy to copy, or by the shortening or lengthening of a skirt." 
~Elsa Schiaparelli, Italian born French Fashion Designer. 

Schiaparelli might have a point with her definition of fashion but check out my new skirts! 


I made these using Vintage Vogue pattern #2885. I am such a fan of the pattern that I made three of them! Actually, the pink and beige linen skirt on the left was my test fabric since I didn't have any muslin. I've been wearing it despite the fact that pink is not my favourite colour, I guess the wrinkles give it away.  

The middle skirt is made in 100% Cotton stretch Sateen. It is so comfortable. And the skirt on the right shows the back view of the skirt with the kick-pleat in the back. It is make in 100% cotton Liz Claiborne fabric that I found in the home decor department of my local fabric store.      


Tuesday, 5 July 2011

Zipp-a-dee-doo-dah...

Zipp-a-dee... zippers.

You really didn't expect me to break out into song, did you?

Good, because today's post is about zippers.

So, I've been working on the two skirts on my project list. I'm using the Vintage Vogue pattern that I'm absolutely thrilled with, Vogue 2885.

Digging through my zipper drawer it seems that I have a million zippers but not one, never mind two, in the proper size and colour.  What is a sewist to do?  The only thing they can do besides running out to the fabric store to buy another zipper.

The two zippers in the colour that I was looking for were too long for the skirt opening on the side. No worries... a little alterations and it will work.


I just need to measure the zipper, here I'm guess-imating, according to the skirt side marking before I marked it  in pencil.


Time for some hand stitching or a zig-zag stitch. I also like stitch #27 on my sewing machine for this type of job. I hand stitched the teeth of the zipper where I would like the stop to be... about six stitches with heavy weight thread should do the trick.

I finished off the zipper ends with the serger


One down, one to go...


All ready to insert the zipper!  But gotta baste it in place first...


And yeah... here is a fine example of why I don't like sewing zippers. The waist seam got caught in my stitching.  Luckily, I caught it (no pun intended) in the nick of time.


Have I mentioned that this is my favourite sewing tool? Some days I don't know what I would do without a seam ripper by my side.

Monday, 4 July 2011

Hats off...

The hat is finally done! I've been meaning to make a hat for a few weeks now but between indecision and procrastination... well anyway, here it is.

It was made using a McCall's Fashion Accessories pattern from a few years back.  I think there are some really cute hats in this pattern that I still consider fashionable in the current fedora crazed era we're reliving.

I chose hat style A. And I chose a heavy weight red linen that I found in the home decor department of my local fabric store.

Only two pattern pieces! The brim has small pleats where the brim and the crown pieces meet and unseen when worn.

The inside of the hat is finished off with grosgrain ribbon sewn through all thicknesses and top-stitched on the outer edge.

I finished off the hat with a light green ribbon.  

Sunday, 3 July 2011

The line-up...

So I've been busy pressing, pinning, cutting out fabric and interfacing in order to get some of my sewing projects organized.

Here is what I plan to make with my upcoming free time.

Project #1:

The newly arrived Colette patterns are being cut.  The wrap style dress, Crepe, I am making in a blue linen. I know in the picture it looks green for some reason but it really is blue.

I pre-washed the linen fabric in the washing machine and dried it in the dryer. To prevent it from getting all tangled I folded it out in layers about a meter long and pinned the four corners through all the thicknesses.

If you catch it right when the dryer cycle ends and you take out the fabric you can prevent wrinkles from overtaking your newly preshrunk fabric. As you can see I wasn't quick enough and still had to take an iron to it before I lay out the pattern.  

Project #2:

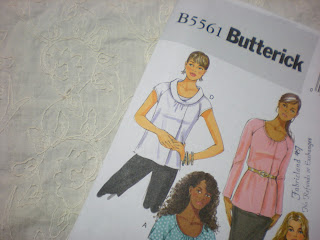
Sencha, from Colette Patterns. I think this is the cutest blouse pattern, and only four pattern pieces! I love the retro vibe the pattern has with the buttons down the back. It reminds me of the blouses my mother use to wear back in the sixties.

I've cut out version 2 of the blouse with the tucks coming from the neckline and bottom hem.

The fabric is a 100% polyester. It is lightweight and I think it will look cute with a white 1940s style skirt. Fingers crossed.  


Project #3 & 4:

 The 1940s skirt pattern that I absolutely love! I could make a dozen of these, but I'll start with two.  It is Vintage Vogue 2885.

The illustration on the pattern envelope shows the skirt as a slim version, but it really is an A-line skirt. No waistband just waist facing pieces and a side zipper (or the option of snap closures).  Front and back darts and a kick pleat.

I'm going to make it in the red and white 100% cotton shown here and the second version in a white 100% Cotton Sateen Stretch.


Project # 5:

I made this blouse for my mom and I have to say I quite liked it, so I'm going to make a different version for myself. But basically the same blouse.

I chose an ivory embroidered 100% cotton. The width was quite narrow and for a moment there I thought that I wouldn't have enough for the collar. I'm so glad I did.  


And my on-going project:  

I save all my scraps to make grocery bags so that I don't use plastic.  It is McCall's 8705 version B. If my left over fabric pieces are not big enough for the pattern piece I sew smaller pieces together until I have a mis-matched, quilted if you like, piece of fabric to cut the pattern piece. The bag is lined so it is nice and strong and the pieced together fabric can go inside.   


Saturday, 2 July 2011

Keeping it Simple

So the big fashion news in this country, at the moment, is what is Kate wearing.  You see, the Duke and Duchess of Cambridge are on a royal tour of parts of Canada.

{source}
Kate is keeping it simple. It works for her. And good choice politically, we're really not a glizty bunch.

When she arrived in Canada she wore a dress by the London-based Canadian-born designer, Erdem Moralioglu. Politically, as Canada and the European Union are engaged in CETA negotiations, a nicely understated statement.

Yesterday at the Canada Day ceremonies at Parliament Hill, the press is all a buzz about Kate's decision to recycle an outfit. You see she wore the dress that she wore for her official engagement photos. Seriously, why would this considered a big deal? Kate looked great and very festive for the occasion as she changed up the look with accessories. Again another subtle statement to the world of politics and economic restraint. Perhaps her stylist has a degree in political science?

Kate's understated elegance has been wooing the media hounds. They praised her decision today when she wore a simple grey dress for a tree planting ceremony. Practical for tree planting, no. But photo worthy, yes.

I'm sure the next few days as Kate and William will travel through Quebec, Prince Edward Island, and the North West Territories she will continue with her simply classic style of dress. I'm not expecting anything whimsical or out of the norm.

But I'm waiting to see what she plans to wear when they arrive in Calgary to open the Calgary Stampede. We know that the Duke and Duchess have accepted an offer to be presented with a pair of custom made cowboy boots. Will she top it off with a cowboy hat perhaps? Or will she don one of Nancy Cherniwchan's stampede fascinators?

The world wide interest in what Kate is wearing doesn't seem to be loosing steam.  As her wedding dress will soon go on display in London later this month and blogs are popping up devoted to what she's wearing, it doesn't appear so. What is our fascination with Kate, or simple Kate as the media has been referring to her as of late?

Do you consider the Duchess of Cambridge a style icon?

Friday, 1 July 2011

Happy Canada Day!

Happy Canada Day to all my Canadian friends and family near and far. I thought I would share one of my favourite poems about Canada. It is by Shane Koyczan, a Canadian poet and writer, from the North West Territories.  


In Shane Koyczan's poem he mentioned that in Canada "... we made these crazy things like zippers ...".  Yea, for zippers! But I had no idea that zippers were Canadian. Did you? Well, if you're not celebrating Canada Day... maybe zippers?

Judson's Clasp Locker {source}
The prototype for the zipper, the clasp locker, was not invented here in Canada.  The clasp locker, an American invention by Whitcomb Judson, had very little commercial success since it was introduced to the world at the 1893 Chicago World's Fair.

Swedish-born Canadian, Gideon Sundback perfected Judson's invention and in 1913 he had designed the modern day zipper.  In 1917 a patent was issued for "the separable fastener".  Sundback also created the manufacturing machine for the separable fastener.

Zippers have come a long way since then in styling, but the basic mechanism remains the same.

Today fabric stores not only carry the functional zippers we use for clothing they carry decorative zippers to add pop to our creations.  Threads has a good article about inserting decorative zippers.

I haven't used a decorative zipper in any of my creations. So far it hasn't been something that I've been inspired to add, although I do like the look of them on others. Maybe it is because it is my least favourite part of sewing... I seem to need to have the seam ripper near by when inserting a zipper.

How about you, have you used decorative zippers?  Do you like the look of them?  Yea, or nay?

August in Review

Sewing, Alterations and Mending This is the most productive I've been at the sewing machine since February.  Back then I also managed to...